Showing posts with label pvp. Show all posts

Wednesday, 30 January 2013

PvP Crash Course: Syn'Ruhkl


Back in October I was contacted by Syn about my pvp crash course. He described himself below:

Ive had an eve account since 2010, and jsut recently got back into the game after a year + break. During the times ive been playing, ive been running missions or doing WH's with my corp, Every time i start a mission or wh, i want to smash my head on my keyboard, they're sooooo boring and i know this game has more to offer.

I want to learn to pvp, i love pvp and mainly pvp in every MMO ive ever player. Im a military shift worker with another kid on the way and my play time is limited. I want to learn the ins and outs of pvp and how to fly ships properly.


Clearly, Syn has some EvE experience - probably a lot more than me when it comes to wormholes, in fact. But he wants to break out of his current routine and learn some pvp. That seemed like a worthy goal, and I liked the fact that he'd jumped right in to W space, which has always seemed like the elite end of the carebear swimming pool.

We initially set up the course for early December, but a personal matter meant Syn needed to reschedule to January. With his training focusing on Amarr, I decided that the Punisher was probably the best ship for the course, so I sent him some fits and a lists of supplies, which he duly moved to Ranellies.

We went through what has become the standard course structure, starting with brawling and kiting ships, moving up to cruisers, and then finally a battle cruiser before ending the lesson with a 1v1. We did touch on D-scan, but differences in time zone meant that I was very conscious that we had a limited  window for the course.

As in previous lessons, Syn knew my 1v1 fit ahead of time, and we discussed the pro's and con's of my brawling Condor v his Punisher. I pointed out that I would probably have better control of the range, having a web, unless he decided to use his neut to shut down my mids. Unfortunately, neuting me out would only shut down my mids, and with cap-less weapons and no active tank this came at a price for Syn, as it would limit his own ability to run his repair system.

On the other hand, my ship is cap stable with the neut running, so active tanking was likely to be limited in any event. Syn was going to need to decide how to play this fight.

For my part, I considered the Punisher's excellent ability to project damage right into my worst resists. I could probably hold Syn at range if I wanted to, but I was not sure that I could wear down his active tank faster than he would tear down my buffer.

Instead, I decided to try and take advantage of his poor tracking by getting in really, really close. I'd also use my neut to shut down his tank. Of course, if Syn's tracking were better than I expected, I'd simply get a face full of Navy Multifrequency, and I'd be too close to disengage.


The fight:

0:41 - I warp to the agreed fight location (local was quite busy, so we used a safe), and see Syn at about 60km. I simply hit 500m orbit, as this is the fastest way to get under his guns - spiraling in will just give him more time to hit me.

0:44 - I preheat my guns - this is going to have to be fast and furious.

1:12 - After a period of just motoring towards each other, I start to target Syn at a range of about 20km.

1:18 - Syn's inexperience with pvp shows itself here; I've already opened fire on him (we are about 7.5km apart), and he's only just started to target me. The approach was his best opportunity to get some solid hits, and he's let the opportunity pass.

1:24 - Syn rallies, and has the presence of mind to start his guns before he activates his point. He lands two very solid hits and then a penetrating hit as I close the distance to 300m. If that kind of punishment keeps up, I'm going home in a pod. However, my web is active, and Syn's speed has droped to 266km/s; I've got complete range control.

1:30 - I'm still getting hit, but it's a grazing hit. I'm also getting into Syn's armor now, so I'm actually doing damage. In what was probably a mistake, I've not activated my neut yet. I quickly move to correct that oversight.

1:38 - My tactics start to pay off as Syn's damage drops through the floor. However, my accumulated heat is nearly at maximum, and I honestly can't believe how little heat damage my launchers have taken. My lucky day, I guess.

1:53 - The fight has swung heavily in my favour, and I'm half way through Syn's tank. He's trying to counter neut me, which is smart (without that, I can just perma run the neut), but it means he can't use his repair system.

2:11 - My high slots are redlined, and I'm swimming in heat damage. I've been on overload for about a minute and a half. Only perfect Thermodynamics skills are keeping me in this fight. On the other hand, my damage has just spiked, so I've probably neuted out Syn's damage control. Whenever I fight Punishers I'm reminded just how damn tough they are.

2:16 - The Punisher finally explodes, and Syn get's his pod out. Well fought!


Afterthoughts:

This was an excellent fight, but one that really underscores how understanding your way through the fight is so much more important twitch reflexes in this game. As far as I can tell, both Syn and I simply hit "orbit" and focused on our modules through most of the fight - fancy piloting was never going to play a role in this matchup.

As it happens, my combination of fit and tactics beat Syn's combination of fit and tactics. If I'd stayed at range, Syn would have pulverised me. If he'd fit tracking rigs & Gatlings, he would have mauled me in close. If he'd had a nos instead of a neut, he would have lasted longer (although probably still exploded). The decisions we both made before the battle played the biggest role in deciding who got to fly their ship home.

Of course, it's not too helpful to simply say "my fit beat your fit", and I'll try and suggest what I might have tried if the roles were reversed.

First, I would have made the Condor chase me, maximising the solid hit's I'd get on the approach. I'd definitely have preheated my guns and targeted early, just to make sure I was getting every last ounce of damage out of that phase of the fight. I might have been tempted to overload my prop mod for as long as possible too, as that would have kept the initial damage from the Condor lower.

Once I saw that the Condor was under my guns, I'd have aligned to a celestial to try and get the tracking down as low as possible, while probably turning off the overload on my guns. I'd try to rep us as much damage as I could while I still had cap, and then use my neut to try and counter neut - getting the Condor to drop the web would create another chase, bringing the tracking right down.

Would that have been enough? I don't know. That Condor would know it had been kissed, though.


Course feedback (instructor):

What stood out about Syn was his interest in ship fittings. Unlike my other student's, Syn brought four Punishers that were all rigged slightly differently, as he wanted to get a feel for the difference that these changes made. That meant we were able to compare Trimark Punishers to dps Punishers on a couple of exercises, which I hope Syn found useful.

Given the importance ship fittings it solo pvp, I'd encourage Syn to continue focusing on that part of his pvp. His natural curiosity may well lead him to be that rarest of pvpers - one that actually creates new and decent fits! Once he pins down his preferred flying style, I suspect his ships will be models of efficiency.

Like anyone new to pvp, Syn also needs to turn what he knows intellectually into habits, so that in the heat of combat things are happening automatically. From little things like targeting early to understanding the best ways to pilot to maximise your dps (or minimise the other guy's), all these factors add up. The best way of doing that, of course, is to get out there and find some fights.


Course feedback (student):

Thanks for the lessons, i learned quite a bit from them, especially with regards to my own skills, and the limitations of amarr ships and capacitor. Definitly see were i need to improve on my navigation skills and how i approach different encounters.
The lessons were well laid out and flowed into one another, so it was a build on to previous lessons. Some lessons could have been a bit longer, but shortness in most cases were due to my ship going pop. The kit list for the fittings is good, but as we discussed, atleast one NOS needs to be added to the list and maybe nanite paste to reduce time to and from station to repair burnt out gear.
Hopefully in the future we can try this again and hopefully i can come out of it with atleast one win.
Thanks and fly safe


Final comments:


Syn's absolutely right about the nos; I should have included at least one nos fitting on the list of ships, and that was an oversight on my part. It would also have allowed Syn to run his active tank longer on some exercises (like the drone swatting), which would have probably addressed the issue of having more time. When coming up with the base fits, I'm usually trying to get the ships to illustrate certain teaching points, and in this case I didn't consider the simple logistics of how long the tank would run without the nos.

If Syn came out of this with a better understanding of the weaknesses of Amarr ships, then I'm glad. Of course, learning about the strengths of Amarr ships won't happen until he tries something else and watches it disintegrate in 20 seconds, rather than stand up to perfect skilled, overloaded missile launchers for a minute and a half! That's always the way, though; we always focus on the shortcomings of whatever we're flying, because those are the things the kill us.

I wish Syn the best of luck with his future pvp, and encourage him to get out there and fight the good fight!

Tuesday, 15 January 2013

Planning a road trip


There's not been much news here since being away on holiday, although there is another training session video to analyze soon. However, that's not to say I've not been doing anything, because I've actually been quite busy.

Recently, I've felt in a bit of a rut with EvE. I mostly fly the same ships through the same systems, and my heart just hasn't been in it. So I've decided to shake things up with a road trip. A long road trip.

I want to travel high sec again, and reach those low sec pockets I used to roam as a young pilot. I want to delve into null sec, and explore wormholes. All of this would be far easier if my sec status were not in Satan's basement, so I'm currently out in null sec, in a bomber, ratting up my sec status and getting to know null in a way I never have before. It's actually been quite fun, and I look forward to coming back in something bigger once I have sufficient bookmarks to survive the experience.

I'm also liquidating my back-stock of ships. By turning this into ISK, I can travel a little lighter, picking up what I need as I go, without the need for a base. The occasional corp op will still be on the menu (thank you, jump clones), and so will the occasional training session. Otherwise, it's the road for me, and whatever pvp I find along the way.

Right now, a bomber is perfect for exploring null sec and making bookmarks (gate safes being the most important) while I rat up my sec status. I could switch to a pvp bomber later, I suppose, but with Recons V, I'm wondering if the Pilgrim wouldn't be a better choice. I want to be able to kill stuff, but also evade gate camps, which probably means a standard BC is out.

So, I guess I'd better start working on a fit...

Thursday, 3 January 2013

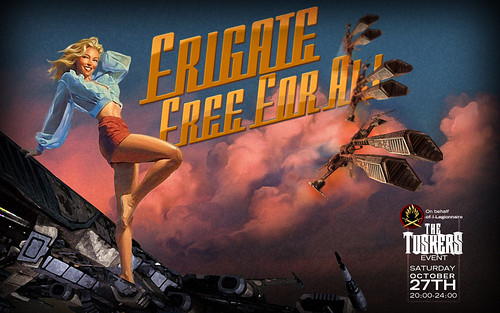
Tuskers Frigate Free For All II


Need I say more?

Seriously, if this is even half as awesome as the last one, this is not to be missed. More info here.

Tuesday, 13 November 2012

PvP Crash Course: Manu


This is another PvP Crash Course video and fight analysis. I've been messing about with EvE and FRAPS settings, and I've managed something a little higher quality than in the past. I've also figured out why my voice has not been recorded previously, and fixed it. However, it seems that I've done so by excluding all other sound. So I'm still working on that one.

Manu was a much younger character than I anticipated taking on, but I was impressed by his enthusiasm and the quality of his application. Here is a small excerpt his EvEmail.

I am extremely new to Eve, i have been flying a little over 2 weeks now, and am in love with the game. I was waiting for my new computer for around 2 months and during that time read about, researched, and followed Eve as much as I could. This is the game I have been searching for and I am happy I have finally found it. While I love how Eve has so many different paths to make, I am in it for PvP. I joined RvB right from the start, day 2, so that I could get into pvp immediately. I have been playing daily and flying in fleets/roaming as much as possible, trying to take in as much as I can. Luckily I took advantage of the Buddy Invite program and got a nice amount of starting isk to support my early PvP.

This kind of introduction told me much of what I needed to know. He had the resources to actually afford the ships he would lose on the course (always a question mark for such a young character) and had already shown a serious commitment to pvp. Excellent!

There was some difficulty with fits, as Manu is obviously a very low skill point character. I also told him that he absolutely had to have Thermodynamics I trained by the day of the course, which I imagine ate up about a week or so.

I ran this course a little differently, as Manu is a Gallente pilot, focusing on the Incursus. With no utility high slot to power the active tank, above class kills are especially tricky for Incursus pilots. On the other hand, Manu could theoretically break the tank on my Vengeance, and would be very strong in on-class fights.

I therefore started with the larger hulls and worked down. This enabled us to discuss mechanics on hulls that could tank his damage easily, while allowing him to try and apply those lessons to later hulls where he actually had a chance of victory.

I've discussed the specifics of the course before, and this set of lessons was very similar, but with a very heavy focus on the mechanics of Overloading, as well as an in depth discussion of the strengths and weaknesses of Gallente ships.

The final lesson, then, resulted in the above video. After the painful experience of flying the Punisher again, I decided that I'd simply fly missile based ship but only use meta weapons and T1 ammo. In hindsight, this was a far better choice, as my familiarity with the systems meant that I was able to spend more time focusing on what Manu was doing rather than flying my own ship. Ultimately, I think that was more helpful.

Prior to the fight, we talked about our respective fits, and my slightly superior speed (thanks to being shield tanked). This meant that Manu would need to close range as much as possible, so that, even as I tried to back off, he would be able to maximise the time I spent within his optimal. I explained that the best way to achieve this was on the initial approach, when our respective momentums would carry us right past each other (I did not intend doing anything too tricky, like spiraling in). Overheating his guns early would be key, too, but he had to watch that they did not burn out.

On a side note, this was the day of the Tusker FFA, and the first time I let Manu hunt me, someone else got there first! Because they were also flying an Incursus, I thought Manu had found me and I engaged. As I'm talking him through the fight, he tells me "Um, that's not me." I nearly die laughing and use my better speed and range control to leave the fight and meet Manu at a safe. I reload my launchers, and we let the fight start.


The fight:

0:01 - Manu is a little slow to target me, perhaps because of low character skills, or perhaps because he waited until I was within scram range to start the targeting. Either way, I've got him scrammed and webbed before he even has me locked.

0:04 - As I've mentioned elsewhere, my guns are one of the last things I turn on, and I've already spent a few seconds considering my range and speed before I activate them. I'm not overheating, as I already have a significant skill point advantage over Manu.

0:10 - Manu has me scrammed but not webbed! I don't notice yet, because I'm watching our range and his speed. I can see that he's missed the opportunity to keep me close, but I want to see how he reacts. I'm hoping that he'll overheat his afterburner and hit approach. As it is, I'm too far out of range for him to hit me.

0:14 - Manu has opened fire, presumably to try and make sure his weapons are cycling when he manages to hit range. At this stage I'm pretty sure I've just selected a 5km orbit, and am not doing much else.

0:22 - Now, Manu remembers his drone, which is excellent, because I've forgotten all about it. He does not have T2 drone skills, but the fact that he's launched it is a very good sign.

0:28 - After having let Manu try and find his own way, I start commenting on the fight, suggesting that he overload his repair system. I've got a neut on this ship (and I'm cap stable with the neut running), but I prefer to keep the range advantage that I have rather than risk closing my orbit in order to use the neut. I also want the fight to last a bit, so Manu has a chance to try and think his way through this, and shutting down his tank would end the fight pretty quickly.

0:39 - With the repair system overloaded, I can't break his tank (until the repair system burns out, that is), which is a good thing. As noted above, I want Manu to have a little more time to try and catch me, and get as much as he can out of this fight. I also want to see how well he can keep an eye on his heat damage.

0:49 - At this point, I start to directly address the issue that Manu is having with this fight, which is range dictation. This is always going to be a key point for blaster fit boats, and I don't want to wait until after the fight before I raise it.

1:16 - After suggesting that he overheat his AB (which should have given him range dictation over me as I'm not overheating anything), I notice that he's still not closing the range. I take a look at my own speed, and see that I'm still doing over 1000 km/s. That forces me to double check everything, and I see that Manu never activated his web. I immediately draw that to his attention.

1:25 - Manu does activate his web, and my speed immediately starts to drop. Unfortunately, it's too little too late, and Manu explodes.

1:31 - Here, both Manu and I screw up. Manu does not get his pod out in time (a recurring problem for him), but I fail to stop my momentum in time, and so immediately after pointing him, I'm carried out of scram range.


Afterthoughts:

Like most new pvpers, one of Manu's main difficulties is simply remembering the myriad of things he needs to do while in combat. Here, as is often the case, a single oversight turned a fairly even fight into pigeon shoot. It's unfortunate, but ultimately the lesson ought to be very useful.

I suffered from this many times when I started out, and it won't go away until you teach yourself to constantly review your modules - you don't just hit the button once and ignore it! Once you start doing that, you will still make mistakes (or lag will drop your command to the server), but you will also catch those mistakes before they are fatal.

What would I have done if I were in Manu's shoes? I would have simply hit approach, because tracking makes no difference against my rockets. I would have overheated my point and web on the initial approach, and taken them off overheat as soon as range allowed. I would then have overheated my guns as soon as I was in range, and left them there for as long as I could. Me being me, I'd totally forget to drop my drone.

While keeping an eye on my heat damage, I would have been focusing on range and speed, when it became clear than my opponent was trying to increase the range, I would have overheated my afterburner, to try and keep them within my optimal for as long as possible.

Finally, if it looked like they were going to outrange me, I would have dropped my web and started burning in the opposite direction, trying to get them to overshoot, so I could warp out.


Course feedback (instructor):

I'm not sure I would offer this course to such a young character again, and not because of anything Manu did wrong. There were simply some exercises that didn't work well because of Manu's lack of skill points. One example is where we were practicing the approach against turret cruisers. Manu was making perfect approaches, but his lack of Navigation skills meant that he was going from full hits to light hits, rather than to no hits. That does not really reinforce the learning point, as, from Manu's point of view, the result was not really worth the added effort of manual piloting.

Manu did seem to get overwhelmed with the sheer number of things that have to be done, and Gallente frigates are notorious for front-loading the pilot's work. Those first few seconds are really make-or-break for the Gallente, which significantly increases the learning curve.

However, Manu was also very enthusiastic, and I'm certain that with practice he'll overcome these initial challenges. He has the enthusiasm and aggression necessary to fly Gallente ships well, and I can see him becoming a very dangerous pilot once his support skills are up to par.

 For constant practice, I can't think of any place better for him than RvB. However, he will need to actively review his fights and work to correct any bad habits that he may develop. All solo pvpers need to be very critical of their own performance, as, ultimately, they are the only person that will push them to do better. We are our own coaches, and we have nobody else to blame if we fail to perform satisfactorily.


Course feedback (student):

A recent hurricane has meant Manu has been unable to send me any detailed feedback. However, in his verbal feedback, he told me that the course had really opened his eyes to how much was actually happening during a fight. We had delved deeply into the various mechanics of the fight, as well as basic manual piloting, and there was so much more to pvp than "orbit + F1".


Final recommendations:

I'm glad that Manu found the course useful, and I hope that he finds my post-fight analysis helpful too, when he can read it. I would also encourage him to continue with pvp, as he clearly enjoys it. While I have focused on the challenges Manu faces, he should not feel that he is in any way behind the curve. All he has to do is look at some early posts on this blog to see that I had far, far more to learn than Manu does when I was three weeks old.


Monday, 5 November 2012

Crow v Malediction


I've been having connection issues for the past week, which has meant no EVE and no updates. Hopefully, I get that sorted soon. In the meantime, here's another old fight I pulled out of my draft posts folder.


The hunt:

After chasing around a Talos in my Crow, having a Rifter flee from me, and generally being avoided like the plauge, Lacal told me about a Malediction looking for a fight in Vif, just of the Lad gate.

I jumped in, and quickly scanned the Malediction to a belt. I jumped in at range, and closed the distance fast.

I could tell from his speed that he was AB fit, which meant a scram. So I settled into an orbit and opened fire, whereupon he would race towards me. I'd pull range to avoid getting scrammed, and he'd zip out of weapons range while repairing the damage he had taken. Rinse and repeat.

Having flown the Malediction extensively, I was not surprised by his point range, and managed to keep evading him for about 10 minutes. However, as he kept repping up to full armor, I was no closer to winning than he was.

Now, the smart money, the profitable money, would be to just leave, but after such an intense maneouver fight, I did not want to just let this go. So I decided on a risky move. I'd load close range ammo, overheat, and charge into range. While the Maledicition was a tanky ship, so is my Crow. I had a decent chance of overloading his repair system and taking the win. After all, I had a higher dps than him, and probably a bigger buffer (he was too fast for a plated fit).

On the other hand, my shield tanking skills are still weak. And without my mwd, he'd be doing full damage with his rockets, while mine would still suffer "tracking" penalties.

Despite the risk, this was the only way to end such an awesome fight. I charged in.

It was a very close battle. I think I took him by surprise, as I took out most of his armor buffer before he overheated his repair system. In the end, though, my weak tanking skills made the difference, and I was the one leaving a wreck in system.


Afterthoughts:

I spent some time chatting with the pilot after the fight, and (ironically) he reads this blog, and was flying a Malediction inspired by one of posts. Heh. That'll teach me.

Apparently, I was also very, very close to burning out his repair system when I went down, so decent tanking skills might have swung things my way. It's good to know that my "cunning plan" was not completely off the wall.

Despite the loss, I was really happy with the fight. My opponent flew superbly, and it's one of those close fought battles can still give me the shakes. Absolutely fantastic.

Wednesday, 31 October 2012

Tusker Frigate FFA Results


Well, the Tusker Frigate FFA has come and gone (and an amazing time it was, too), and the results are up!

Congratulations to the winners, as well as everyone else who took part! If you missed out on the FFA, however, (or just really want to do it again) we might have something for you in the new year...

Saturday, 27 October 2012

Tuskers & Alpha Volley Union v Various


The above videos were taken by someone with a far better computer than mine, and so are of pretty decent quality. This was a mixed Tusker and Alpha Volley Union black ops fleet, and we bridged around Gallente low sec, causing mayhem.

I was flying a Purifier (although I'm also tempted to fit up a Manticore), with a TD in the mids. I started out with a TP, but switched up when only one other person had brought a TD. This also made sense, in hindsight, as I have the bare minimum points in Target Painters, whereas my Tracking Disruptor skills are maxed out.

I won't go into any detail regarding the fights - it's all right there, after all, and a black ops gank pretty much only goes one way, when it goes right. Instead, I shall say that the roam was loads of fun, and I look forward to the next time we organize something similar. I enjoyed finally putting all my Torpedo skills to good use.

Wednesday, 24 October 2012

PvP Crash Course: Bjarni


The final part of my PvP Crash Course is a 1v1 against me, and a fight analysis on this blog. Bjarni was the first student to take part in my course (although, from the mail that I am receiving, not the last). Here's what he has to say about himself. 

As you might have noticed, this character is fairly old, I made it with a few of my friends many winters ago. The idea of EVE, the intrigue, the backstabbing, the single shard universe where you can be "somebody", always fascinated me. But only that, 'the idea of EVE'. My experience was fairly different. My friends soon left and I was alone in the big black sky and quit soon after. Came back!.. then left again. Rinse & Repeat. It wasn't until several months ago when I figured out where it all went wrong. I relied on everyone else to get me somewhere, mostly ISK... making ISK felt like some dark art that only the most brilliant people could do, or the ones willing to spend hours upon hours in PvE. I was neither until I did the hard work of learning how play the market. Suddenly I had billions coming out of my ears but most importantly, I had options. The options to play EVE the way I wanted to. Which for me is PvP, all the way, but I quickly noticed that a side effect of being rich is that I got really cheap! And that I'm scared as hell of scratching my ships. But I'm working on that. Baby steps.

I've got some good friends in game who are recovering Carebears, and they're damn fine pilots. If I can help Bjarni find his feet in pvp, I'm happy to do it.


The course is divided into six lessons, and it ran to about three and half hours. In the first lesson we covered safe spots and D-scanning. In the second lesson we looked at how to fight against a brawling fit, and really took a close look at how missiles and turrets actually deal damage in a fight. The third lesson focused on kiting and maneuver. The fourth lesson included cruisers, drones and ewar. The fifth lesson focused on fighting against battlecruisers and the inevitable war of attrition that this involves.

The sixth and final lesson, then, resulted in the video above. I'm flying the Punisher, while Bjarni flies the Rifter. I chose the Punisher for the simple reason that my turret skills are frozen at the level of a six month old character. Flying the Punisher, therefore, helps simulate a fellow "noob".

Bjarni knew my fit, and before the fight we spent some time discussing it in detail. We focused on the comparative active tanks and ehp, as well as the respective optimal ranges. We looked at the implications of the neut in my utility high slot, and I told him that he was going to have to choose between evading my neut and pitting his tank and damage projection against mine, or trying to get under my guns while accepting that his active tank would be unlikely to work.

I then jumped into the next system, and Bjarni was to track me down on D-scan, and jump in on me. I reminded him that he had to keep me pointed, or I would try to escape if the fight went against me.


The fight:

0:08 - I turn from my initial vector to meet Bjarni.

0:29 - Just as Bjarni had to make a choice, so did I, and this is where I make it. It's a subtle thing, hitting "orbit", which is set at 2km. If I had wanted to fight at range, I should have changed course and required him to run me down while I used Scorch to hit him on the nose. However, if I wanted to use my neut, I needed to approach him at high speed so that our collective momentum would bring him into neut range before he could correct. In making my decision to fight in close I overlooked one point that I've not had to deal with in a while, but I'll get to that later.

0:35 - I open fire much earlier than I needed to, but I wanted my guns cycling as soon as I was within range.

0:39 > 0:45 - I start landing hits at 14km out. The next few hits are solid, wiping out 3/4 of his shields, while being barely scratched in return. The tracking then goes to hell as we race past each other. He's in neut range, though, so I start hitting him with that too.

0:53 > 1:01 - We're both still hitting each other, and he's starting into armour while I'm at 1/3 shields. I overheat my guns, but then pull them off overheat because I miss three shots in a row.

1:10 - At this point I make what I feel is my first big mistake of the fight; I turn off my neut. I was starting into armour and not getting any real hits. Feeling my strategy was not working, I decided to try something else. What I did not notice at the time, though, is that Bjarni's web was off - he'd managed to keep everything else active (and lack of good hits meant he did not have to run the repair system), but I gave up just as I would have been about to see the payout.

After the fight Bjarni agreed that there were several points in the fight where a single neut rep more would have shut him down. I got too focused on my own cap, though, and didn't see what was happening to him.

1:24 - By this time, I've stabilised and I'm getting good hits again, so I'm convinced that I've made the right choice. But the lack of pressure has allowed Bjarni to recover some cap, and his web is up.

1:38 - Bjarni is now forced to run the repair system, and his web comes off again. However, he's started to get under my guns, while still landing his own hits.

1:48 - Bjarni has now restabilised, and his web is back up. With that nos, I can't afford to take the pressure off, and I know it. The overheat has gone back on the guns, and I'm switching up my crystals periodically as the range changes to try and keep the hits coming.

1:54 - This is actually a pretty important moment in the fight, because I give up on the orbit and just approach Bjarni, giving me a period of decent tracking. The results are immediate, and I start getting hits. He needs to repair, so the web comes off again.

2:14 - At this point the tracking benefits have worn off because his nav computer has adjusted for my change in flight. I'm missing again, and sure enough, the web comes back on.

2:23 - Here's where I actually get my head together and remember a few things about tracking. I align to the sun, and just start cruising. I've realised that he wants to be in close (and it's working for him), so I want to keep his orbit as regular as possible by flying in a straight line.

2:48 - My change of course gave me just what I needed, and I've got him down to half armor. However, I'd started the maneuver at half armour, and was now down to 1/3rd with an overheating repair system. Bjarni has adjusted his flying again, and I'm getting a few misses.

3:03 - I know I'm going to lose. I worked out the right flight pattern too late into the flight, and my only hope now is to neut out his point and try to warp out. His nos has paid for itself many times over, and is keeping him in the game.

3:07 - I do notice the dropped web this time, and it keeps me hoping for a stroke of luck. The grindiness of this part of the fight makes me kick myself; Bjarni's clearly hurting, and I'm landing hits, even with my poor turret skills. Had I flown like this earlier, I would not be trying to warp out now.

3:20 - I'm having to choose between my neut and the repair system, and only the neut offers any chance of salvation.

3:42 - Boom. Gf, Bjarni. Gf.


Afterthoughts:

First, I need to compliment Bjarni on flying very well. While it would be easy for me to devolve into a rant about how much I hate turrets, the reality is that if either Bjarni or I had made some slightly different decisions, the fight could easily have gone my way. Instead, he managed his modules under my neuts brilliantly, and kept working his orbit to minimize my damage.

My first mistake was forgetting that lasers have an uphill battle against armour tanked ships. I've not used EM damage in ages, so I'd forgotten this until I actually started into Bjarni's armor. Thus, I think my whole premise of getting in, neuting him down, and smashing him fast was flawed. The length of this fight makes it clear that the key was incremental advantage, and I should have simply tried to keep at range as long as possible, and fly so that my tracking was as stable as possible.

My second mistake was not seeing how close Bjarni's capacitor was to failing. As Bjarni confirmed, and as should be clear from the video, he was having serious cap difficulties, but I just didn't see it as my focus was on the combat log as I tried to manage my tracking (not flying turret ships, I don't have angular velocity on my overview).

My final mistake was waiting so long before aligning to the Sun. The entire balance of the battle shifted at that point, and if I'd not been so far behind, it would have made huge difference.

Definitely a good fight.


Course feedback (instructor):

Even before I had a chance to review this video, Bjarni impressed me with this ship handling, and ability to learn and implement new tactics quickly. He really pushed himself on the anti kiting drills, working the maneuvers until he managed them, against both "aggressive" and "defensive" style kiters. If he had a little trouble triggering point, web, and weapons all at the moment of closest approach, it's because that's an awful lot to fit into one second window. I have no doubt that Bjarni will, with practice, become a very difficult, and dangerous, pilot to try kiting.

He also demonstrated quick thinking during the drone drills. Here, he was orbiting my Arbitrator while I sent out waves of different kinds of drones for him to practice webbing and destroying. Key to this process was keeping within nos range of my Arbitrator so that the active tank could be kept running. When he drifted out of nos range he immediately switched his nos to one of the drones, a tactic that he had first been told about only a few minutes earlier.

If Bjarni has a weakness, it's a caution bred of years of pve. He took nearly a quarter of an hour to find me via D-scan, and not because he didn't understand the process. Instead, he was simply very cautious about warping from place to place, and often chose locations based more on their perceived safety rather than their utility as a scanning point. If you know I'm in cluster X, for example, you should warp to planet X, because that planet will be at the center of the cluster, allowing you to separate each element of the cluster on D-scan. Warping to a moon, conversely, will often mean that you still cannot distinguish between different parts of the cluster, despite the fact that you are almost literally next door to me.

That said, I don't feel that this natural caution ever prevented Bjarni from taking calculated risks, and his "up close and personal" approach to the Punisher v Rifter dual did not suggest an unwillingness to take risks - it would have been very easy for him to convince himself to kite, but he didn't and won the fight as a result.


Course feedback (student): 

After making my views public, it's only fair that I give Bjarni the chance to do the same. Here's what he had to say:

Hello there Taurean,

I ran into 
Azual Skoll in Hevrice, I had two expendable Rifters still there and he was kind enough to blow me up and give me some pointers, nice people the Tuskers.

Overall I think the entire thing was spectacular, brought me out of my shell and taught me some new things which was exactly what I was after.
I wrote a little bit down after the course, let me know if I forgot something and I'll send you another essay.

The Duration: The length of the course was fine, EVE PvP isn't something you can explain in 60 minutes anyways and the techniques get absorbed at different rates to different people. Although it would have been shorter if I had asked a couple hundred fewer questions.

The Material: All of your techniques were well explained and in-depth, I don't think I ever needed a further explanation of what you just taught me. I felt like I was starting at the bottom of the pyramid and working my way up and learning more advanced tactics, which suited me perfectly.

The Execution: Besides the literal execution of my shiny Rifters? :( In all seriousness it felt really nice to lose my ships, it really cemented what you were trying to teach and what happens when it fails.

Suggestions: I believe we have similiar teaching styles and this is something I often use when teaching techniques to beginners in martial arts or Parkour.

A some kind of Before/After, I definitely noticed some improvement in my decision making and what to do in the Punisher duel. Some people might be less observant or harder on themselves if they lose and refuse to notice any changes from what you taught them. A straight up "You did "this much" better at the end than in the beginning." might be helpful to some people.

This is what I wrote up soon after your course, ask away if I missed something.


Regards,
Bjarni Veigar.


I totally hold my hand up on the end of course feedback. It had always been my intention to do something comprehensive after I'd had the time to review the videos and digest the results, but I should have been clearer about that, rather than leave you hanging.

Thanks for the feedback!


Final recommendations:

I'm glad that Bjarni felt he came out of his shell, but what I want to make sure of is that he doesn't retreat back into that shell and disconnect with EvE again, as he has in the past.

To this end, I'd recommend that he join a decent pvp corp and find a target rich environment. While I might ordinarily recommend Red v Blue, my gut tells me that Bjarni's the kind of pilot that has an appreciation for the big picture, and the context of the fight in relation to some larger goal. Thus, he might find even more enjoyment in faction warfare or null sec. Perhaps commenters can suggest reputable corps for Bjarni, as I have no direct experience with life outside lowsec, and my FW stint lasted less than 24 hours.

I would also encourage him to keep focusing on small ships for the time being. I really feel that one of his strengths is going to be his piloting, and smaller, more nimble ships will reward him more fully for that skill than larger, slower hulls.

Monday, 22 October 2012

Tuskers v Rennfeuer


Several of our members are keen wormhole hunters, and thanks to these pilots, the Tuskers generally know, at any given time, exactly where the wormholes in Hevrice and the surrounding areas lead. On this particular day, we found a wormhole leading to nullsec, so an impromptu HAC fleet was assembled, and yours truly flew fleet ewar again.

It was the same half fit Arbitrator from before, and I was eager to do my bit to ensure that the enemy hit us no harder than a particularly undernourished school-girl. To quote Fezic from Princess Bride, "My way's not very sportsman-like."

We jumped through the wormhole. This was actually the second roam that day, the first having been a BS fleet, and now the reason why we were limited to HACs; nobody wanted to get trapped deep in null.


The fight:

Our scouts had already located the enemy, so finding the fight was easy. However, this fight was to work out very differently from the last one.

Instead of a brawl, our engagement turned into a running fight. This, in and of itself, is not too remarkable; the Tuskers are quite used to running fights. What we are not used to is the fact that we were not the ones running - they were!

They had an Oracle fleet, along with some ewar. They burned away, forcing us into a stern chase, while they used their range to fire on us. Clever fellows.

Now, what made this fight interesting for me was the speed at which everyone was moving. The Oracles were cruising along comfortably at 1600m/s, whereas my Arbitrator only does about 1100m/s. I had also warped into the fight at a respectful range, as the Oracles had a strong ability to pick me out if I strayed too near. This meant that by the time both sides disengaged, I was 160 km from the Oracles, and unable to bring my ewar to into play!

Both sides warped out with a few kills scored.


Afterthoughts:

This is an obvious issue for fleet ewar - I need to keep up with the fleet! Unfortunately, the obvious way of doing so (losing the 1600mm plate) will just get me alpha'd. Apparently the Arbitrator will be getting a speed boost this winter, which it clearly needs.

It's also an interesting distinction between logi and ewar. Logi need to be within range of the friendly fleet, but ewar needs to be in range of the enemy fleet. While hanging out with the logi is reasonably safe, in running fights like these I need to break away and act aggressively to close the distance between my ship and the enemy dps.

I'm also still working on my final fit, but right now I've boosted the targeting and TD range with rigs, so next time I should at least be able to participate for more of the battle. I will also consider burning away from the fight once I lose range, so that I can warp back in again on my fleet mates.

Despite the speed problem, it was a fun fight, and I look forward to running fleet ewar again.

I can also say that I would strongly recommend a stint as ewar to anyone wishing to become an FC. I've learned more about fleet engagements in two fights as ewar than I did in dozens of fights as tackle. Seeing the big picture puts everything into perspective.


Wednesday, 17 October 2012

Tuskers v Null Sec


As promised, I've got some Arbitrator fleet engagements to write about. I won't go into every last movement of the fleet, but I will focus on the parts where I feel learning points arise. If my recollection of these events is a little fuzzy, it's because I did not FRAPS it - I'm not risking a DC when I've got corp-mates counting on me.

The fight:

There were about a dozen of us, mostly in armor HACs, but with me flying an Arbitrator, and two logi to back us up. I'd just grabbed something from the corp hanger, and it mostly consisted of a strong buffer tank, a prop mod and three TDs. Very much an unfinished fit.

We had taken down the occasional BC that had wandered into us, but we had yet to really find a proper target. However, our scouts were telling us that this was about to change, and that there was an enemy gang in our path; numerous BCs backed up by several Guardians. While I am unclear on the number of Guardians (I think it was about four), it was clear from the initial report that we probably lacked the dps to break the logi chain, and most of our pilots had brought dps drones rather than ewar drones, leaving us little chance of breaking their lock with ewar.

Still, it sounded like a fun fight. They outnumbered us, although not by too much, and they had heavier ships. Positioning would be key, and so we warped to gate, putting the HACs in close and the logi further back (for positioning purposes, the Arbitrator is a logi). When they jumped through, the HACs would brawl it up, and keep the BCs locked down and unable to hit the logi. Their logi, on the other hand, would have to sit in the middle of the fight.

Honestly, we have some really good FCs in the Tuskers, and the plan sounded really solid. However, it was dependent on the enemy jumping into us, confident of their weight in ships and pilots. It turns out, though, that for some reason the gang decided not to jump into our cunningly laid battleground.

Realising that we would have to take the fight to them, we all approached and jumped through the gate. They  clearly had eyes on us, however, because they immediately sprang their own ambush, warping to the gate as soon as we jumped through.

Fortunately, we have members in corp who compulsively spam their Dscan, and so we saw them coming before they started landing on grid. Acting fast, Sule ordered us to jump to a particular belt at range, and we managed to all get off the gate before they could land and point anyone.

On landing at the belt, the logi and ewar (ie, me), immediately burned straight up, putting as much distance as we could between ourselves and the landing point. When the enemy fleet followed us to the belt, they landed among the HACs, with the logi again at a distance. Although it had required some quick thinking and fancy footwork, our original plan was intact.

What followed was a massive brawl. I piloted around the fight at about 60km, always aligned to something, and kept two Hurricanes and a Vigilant pinned down by reducing their optimal and falloff by about 80%. I like to think that at least one of them tossed their keyboard across the room in frustration.

Our logi pilots were brilliant, largely keeping the fleet in one piece, except for poor Dian, who was primary when a Falcon uncloaked and disrupted our rep chain temporarily. It cost them the Falcon, though.

Beyond that, the fight was a bit of a stalemate. We tried switching our dps around, but their Guardians were able to keep up. Similarly, our own Oneiros, combined with the dps hit they were taking from my TDs, were enough to counter their damage. We probably would have pulled out, but they had a few of our own tackled, and we don't like to leave people behind if we can help it. So we stayed.

Eventually, a third party lit a cyno, and we found ourselves hot dropped.  Everyone scattered, and nearly all Tuskers got away. The other side was less fortunate, and we scored some killmails that we would otherwise have missed.

Bidding them all a "gf" (they'd fought smart and willingly engaged us in a belt, after all), we turned for home.


Afterthoughts:

I completely accept that this was a very easy first fight for me as a new ewar pilot - which is exactly what I needed. Nobody tried to kill me, and I was able to focus on maneuver and ewar without distraction.

What I saw, I really liked. I looked at the enemy fleet with completely new eyes - as a tackler, you are just trying to stay alive while pinning down the primary. This is almost the definition of tunnel vision. As ewar, I'm looking for the strongest members of the enemy fleet, and trying to take them out of the fight. It was great fun.

However, it also gave me a chance to find some of the limitations to the Arbitrator. To begin with, my TDs have a much longer range than my actual ship does. I would have liked to hang out with the Oneiros, so we could offer mutual protection to each other from drones and interceptors (alright, so I could protect them while they keep me topped up), but that was not possible. My targeting skills are maxed out, and both my low and mid slots are spoken for. Getting more targeting range with therefore involve rigging, and I'll be putting together a dedicated fleet fit soon.

In the high slots, range mods for my drones seems sensible. Fleet fights often require me to warp and short notice, so while I carried a range of drones when flying solo, I feel like I want to carry multiples of only a few kinds of drone, and probably small drones at that - the larger ones spend a lot of time traveling between targets, and I can carry fewer of them.

On that note, it seems like a mix of Warriors (fast), ECM, and repair drones would be best. I know repair drones are not great, but as a frigate pilot I know that there are some targets that need topping up that logis don't have time for. And, as this fight taught me, sometimes the logis can't help. Perhaps those drones would make a difference. Something I'll have to test.


Monday, 15 October 2012

Arbitrator 04.01


The hunt:

I was roaming, as usual, and due to time constraints I kept myself fairly local. Several times I encountered a Vexor running faction warfare plexes, and seeing this as the perfect opportunity to test my Arbitrator, I kept trying to jump in.

Unfortunately, the pilot was always some distance off the gate, and every time I jumped in, he'd warp off to a station and log out. I'd see him again ten minutes later, one system over, doing another plex.

After repeating this pattern about three times, I switched to my Crow, jumped into his plex, overheated my point and mwd, and actually managed to catch him. From there, it was a simple matter of outrunning his Hobgoblins and evading his guns while chipping away at his tank.

Eventually, he exploded.

I had a video of the fight, but it cut off half way through because the partition I had FRAPS on ran out of space. And watching me kite a Vexor down is going to be about as interesting as watching paint dry if you don't get to see an explosion at the end. So no video today.


Afterthoughts:

I could have posted this as a standalone Crow v Vexor fight, but I chose to post it as an Arbitrator fight. Why? Because the fact that I couldn't kill the Vexor in an Arbitrator is just as important as the fact that I could kill the Vexor in a Crow.

I'll be honest, I'm not liking the Arbitrator as a solo boat. It just doesn't let me do anything new. I'm a pretty decent frigate pilot, and I can reasonably attack most frigates or cruisers (and some battlecruisers) in just an interceptor - active tanks are the only thing that I really struggle with, and I can escape from those fights fairly easily.

With that in mind, I'm not really sure what the Arbitrator offers in a solo environment. I'm not saying it can't be a decent solo boat (pilots I respect have sworn by it), bit I'm not feeling that it fits my roaming and fighting style. I don't bait, and I don't camp; I go on long roams and try to catch lone pilots before they know I'm there. Ship handling (keeping range and transversal) is the single most important factor in my fights.

So I don't see myself flying a solo Arbitrator much more. Instead, I'll be looking to explore the Arbitrator in a fleet role, as that does offer something that an interceptor does not.

Of course, because I'm posting about a week or so behind my flying, and I make this claim secure in the knowledge that I've already flown in a couple of gangs as fleet ewar, and am very much enjoying the role. It's what Arbitrators were made to do, and they do it well. I'll have some posts coming up all about that, so expect to see plenty more Arbi action, just not in solo fights.

Tuesday, 25 September 2012

Arbitrator 02


Edit: I've largely convinced youtube to behave, and the above video can now be viewed in HD. It's not perfect, but it's leaps and bounds better than what it was. I'll try and improve the base recording (FRAPS) if I can do so without lagging out during a fight. For those on limited bandwidth, these posts should be able to stand without the video, which is intended as a bonus.


The hunt:

I'd had to go to a board meeting on Saturday, which mean I really only got to play on Sunday (I had to travel to and from the board meeting, and by the time I got back I was to wiped out to play). I got up early, though, and went for a roam that probably lasted about two hours.

I roamed fruitlessly, however. I'm learning to hate my scram, as I missed three targets that were within the range of a long point when they warped out. The Arbitrator is no faster than my Vengeance, and if I'm going to slowly chug towards escaping targets, my Vengeance does that just fine, but with less of a reputation (some people in local told me specifically that they would not fight because I was in an Arbitrator). I even hurled myself into a fight with two destroyers, assuming I would die in a fire, only to have them run out on me.

With the roam a bust, I logged out for down-time, and came back on later in the day. I spent another hour or so roaming, and played tag with some guys in OMS, but still nothing. I was jumping through Heydieles, though, when I spotted a Rifter at an FW site.

Local was packed, and I was pretty sure he would have buddies. He was the only one at the site, though. Perhaps I could sneak up on him? Unlikely, but I wanted a fight, so I warped to the gate.

The Rifter was sitting there, outside the plex, prealigned. As I landed, he activated the gate, and jumped in. Now, I knew it was a trap, and hitting my D-scan told me that there was at least one Stabber Fleet Issue within 14 AU that had not been there before, as well as another Rifter. I could bail, but what fun would that be? I activated the gate.

Landing on top of the Rifter (I guess his plan was to hold me in place?) I snagged him with my overheated scram and hit "approach". Removing the overheat, I hit him with my medium neut, and then the small neuts. I then deactivated the medium neut (did not want to cap myself out needlessly) and unleashed a flight of Warrior II.

Got all that? Yeah, it was a very busy few seconds. And that's when I remembered to turn on FRAPS, and the video starts.

0:00 - I've got three neuts running, and my scram. The TD is NOT running, because I don't think it will help (I'm not going to get under his guns) and I don't think I need it. There is another Rifter in the plex, but he's too far away to be an immediate threat. D-scan tells me I have company coming.

0:01 > 0:04 - Stabber Fleet Issue lands, followed by a Rupture and another Stabber Fleet Issue. Yep, this is going to be as painful as I thought it was going to be.

0:07 - Despite thinking "I'M GONNA DIE!!1!!!!1", I some how manage to watch my modules, and I turn off the third small neut. At this point he ought to have been capped out, and I'm just keeping him shut down. I don't notice at the time, but I'm not actually pointed; running just wasn't on my mind.

0:15 - The Rifter goes down, but the other cruisers have managed to point and web me, and are starting to open fire. I've still not got a firing solution on the Rupture, and things are about to go wrong very, very fast.

0:19 - This is my big failing for the fight. It's only now that I actually start targeting the next ships, and cruisers target much more slowly than my old frigates (equally, I used to use auto return target, so I don't have the habit of lining up further targets). I don't think it would have made an ounce of difference to the outcome of the fight, but it's a really obvious learning point I can take from this. Equally, I should have switched drones out, because my Warrior IIs are not what I need against cruisers. My TD is still not active, but being webbed and scrammed (with the enemy at blank point range) I'm pretty sure that my TD was simply not going to do anything relevant.

0:26 - Taking fire from all three cruisers, I go down in flames, but warp my pod out. The start to finish of my armor damage was about 8 seconds - even if I had turned my repair system on, it would not have finished a cycle.

So, a fast and furious fight, with me taking out one Rifter, but losing my Arbitrator to his friends. BC tells me I came out ahead in points, but barely.


Afterthoughts:

Well, I really enjoyed seeing the video, and being able to go through that second by second felt really useful. Feedback on the new format is appreciated.

In hindsight, there was probably less of a trap than I thought (or a different trap). There was only one Rifter on scan when I jumped, yet when I landed on the gate there was one Rifter at the gate, and (unbeknownst to me) a second Rifter in the plex. I'm guessing that the Rifter in the plex was the one I scanned down, while the Rifter on the gate was another hunter, who, playing tackle for his gang, just happened to land on the gate at the same time as me.

Offensively, I was amazed out just how totally I shut down the Rifter. I've fought cruisers in frigates before, and I've never thought it that big of a deal - it's just something that any Tusker takes for granted. But being on the other side of that fight is pretty eye-opening; he never stood a chance, and went down very fast.

Defensively, the Arbitrator is clearly great it 1v1 fights, but this build lacks the resilience to brawl it up. I miss that aspect of combat, and I could see myself getting into the revamped Maller, if I can get my turret skills up. Or a revamped Caracal. But then, I've always loved tanky ships.

As I noted earlier, though, it was really frustrating to be roaming in such a slow ship but with such a short point. I'm wondering how I might find a faster, longer pointing Arbitrator. Perhaps with guns and defensive (as opposed to offensive) neuts. Something to work on.

Tuesday, 18 September 2012

Arbitrator 01


The fit:


Damage Control II
Energized Adaptive Nano Membrane II
400mm Reinforced Rolled Tungsten Plates I
Medium Armor Repairer II

Y-T8 Overcharged Hydrocarbon Microwarpdrive (not called that anymore, I think)
Medium Electrochemical Capacitor Booster I, Navy Cap Booster 800
Warp Scrambler II
Tracking Disruptor II

Medium Unstable Power Fluctuator I
Small Energy Neutralizer II

Medium Nanobot Accelerator I
Medium Auxiliary Nano Pump I


These first five Arbitrators are going to be classic fits. After that, I'll try some of the shield Arbies that people have recommended. And after that, Arbitrators will hopefully be buffed, and I can work on new fits.


The fight:

I'd been roaming for a little bit in the space near Hevrice - nothing too arduous. I tried jumping in on a couple of Assault Frigates running FW plexes, but I did not manage to catch any. It got my heart pounding, though! I'd forgotten how my body reacts to EvE PvP.

Then a call came out over coms for backup against a Cyclone plexing in Loes. There happened to be a T1 cruiser gang around, so I joined their fleet and made best speed for Loes. I was the first to land on the gate (with FRAPS running, and everything ready to go) and I was asked to jump through and warp to the plex.

I hit jump, and everything froze. I informed fleet, and tried to unlock my computer, but I eventually needed to restart EvE completely. Thus, rather than jump in all together, with some e-war to mitigate damage, we arrived one after another.

Relogging, I joined the fight, jumping in at range. I hit the Cyclone with tracking disruption, and was asked to set my drones on clearing his drones, which I did. Unfortunately, our tackle had already taken too much damage, and was going down - the Cyclone's missiles were unaffected by my drones or ewar. I was therefore asked to make sure I was in position to take over tackle because I was the only other ship with a scram, and the Cyclone was hitting 1700 km/s when we let him activate his mwd.

Activating my mwd, I closed the distance fast, and managed to get my point onto him just before our tackle went down. I shut down my mwd, but I took stupendous levels of damage while it finished it's last cycle. I immediately activated my repair system, but did not (sadly) overheat immediately; I'd forgotten how much longer medium repair system cycles were than small repair system cycles.

I also started triggering my cap boosters, as all this mwd use and repair work had left me pretty low. As my mwd cycle dropped off, the damage lessened, and I hoped that I'd get into a tight orbit around him but, if memory serves, he also had me webbed, and so was able to prevent me from getting under his guns.

With the mwd off and the repair system finally overheated, I gave ground grudgingly, but it was still clear that he was going to break my tank within 30 seconds or so. I announced this on coms, and further tackle made arrived in system just in time to stop him warping off.

I had managed to hold point long enough for somebody else to arrive, but ultimately my poor Arbitrator blew to pieces.

It was enough, though, and the reinforcements took down the last third or so of the Cyclone's structure.

It was a brutal fight (albeit made worse by misfortune and the noobiness of yours truly), but lapotiere stood and fought against the wolves, making is work for our kill. Not to mention taking a few of us with him. I wished him a heartfelt "gf" while warping my capsule away.


Afterthoughts:

I'm not sure why my system crashed, but I can't help but look suspiciously at FRAPS. I've gone through session changes with FRAPS running before, though, so it might just have been bad luck. We'll see.

Disconnects aside, flying the Arbitrator is hard. There were a lot of modules to run, as well as drones to manage. Granted "heavy tackle" is not normally a job assigned to Arbitrators, but I know that I could have performed better than I did. I need to get on top of that module management, though.

If there is one thing I know I am going to hate about this fitting, though, it's how fast I burn through cap. I know that cap stability is a luxury most pvp ships can't afford, but this is so far at the other extreme (12 seconds, actually) that it gives me the heebie-jeebies. Yeah, that's a word.

While it's early days, my general first impression of Cruisers is positive - more so than Battlecruisers, and even some of the specialty frigates (such as Bombers). I'm less certain about e-war, though - I'm a tank and spank kind of pilot, and all this ewar vodoo is outside my comfort zone - but I'll ride this one out. However, I do think I'm going to start bringing my small and medium turret skills up to scratch. With the Caracal and the Omen being buffed, I could see myself moving sideways, rather than back to frigates.

I'm just sad that CCP did not give me a T1 Amarr missile frigate. Still, they did give me a drone frigate, so I can put my drone skills to good use on some cheap ships.


Sunday, 16 September 2012

Sea trials - a test of your systems.


Well, I've just bought 20 Arbitrator hulls (because they are cheap) and fittings for five of those hulls (because they are expensive!). I'm feeling pretty space poor right now, but if I'm honest I could always start selling frigate hulls if  I were desperate for the cash.

I've been trying to decide on a format for presenting (and learning from) my kills. I could always follow the Punisher Plan format, but that seems a little dull - I've been there and done that. Equally, I'm experienced enough that my mistakes will (hopefully) be harder to catch. Not noticing I've neuted out my opponent's point, for example, is something that, by definition, I've not noticed. Hard to catch that from memory.

The obvious solution, then, is to simply record my fights. Having downloaded FRAPS, I now present a test video. Edit: Now a much improved video from youtube.


Now, the video itself is nothing exciting. I'm just flying around a little bit, setting up my overview, and testing out my new hot keys (I have more modules to manage than I did in a frigate, so some shuffling has been necessary). I'll possibly do a post on hotkeys later, if people are actually interested.

My HUD

As far as my HUD is concerned, there are a few key features. First, none of my windows actually touch the side of my screen, which means I can always see where the targeting icons are (often crammed against the side of my screen). Second, my module HUD is up top, not at the bottom. This is because I want to be able to focus on as small a part of my screen as possible when fighting. By putting my modules at the top, I can focus on the top right corner of my screen, as it has my targeting (which is vertical), as well as my overview.

The scanner is just below the overview, so that I can quickly keep an eye on the local area if I'm worried about being mobbed. I'm tempted to switch that for local chat, as that's often a better indicator of what is happening that the scanner. I've also been known to miss comments from my enemies (like "Ransom!") just because I'm not looking at that part of my screen.

I'm not terribly happy with the location of the drone screen, but then that's a new addition. I'd like the box to be taller, so that I can control flights of drones without scrolling. Ideally, then, it would be at the edge of my screen. I'll play around with that, but it does give you a pretty good idea of what I've been using since my first month or so of playing.

Other issues

Just as I used that flight to work out some in-game issues (like hot keys), I used this video to work out some bugs too.

As you can see, the video becomes very choppy once I launch my drones and get into combat with the rats. EvE also slowed down, which is an issue I've not had before. True, I had a few other programs in the background, but I really need to improve the performance issue or this is just not going to work in combat. Given that I've had to massively compress the quality of the video in order to post it, I can probably reduce my FRAPS settings without impacting the final product.

If the picture seems a little "squished" horizontally, that's because of the resizing after compression. Watching the video in a slightly different aspect (16:9 seems to work well) reverses this. I'll see if I can't gradually improve what I'm doing as I gain more experience.

If any more experienced FRAPS users have any hints I'd love to hear them.


Wednesday, 13 July 2011

Combat Graphs


In a recent post I mentioned Kaal pointing me to a website that graphed combat logs, and I had several requests for a link. I'll try and do one better, and give the whole process a walk-through.

The website can be found here. It's a very simple front page; just direct it to the combat log on your computer, and the website does the rest. In theory, it's very easy to use.

In reality, nothing is quite that simple, so let's start from the beginning.


What are combat logs and where are they?

Eve creates combat logs, selective records of the conversation between the client and the server, and stores them somewhere on your computer. How Eve organizes the combat logs and where it stores them is a matter of the preferences set up on your computer, and you may need to dig a bit to find them.

For me, the combat logs are kept in C:\Documents and Settings\Taurean\My Documents\EVE\logs\Gamelogs and each one covers an entire play session. Kaal tells me that his client stores them in a similar location, but that it generates a new log every time he has a session change. This is probably the result of different log settings.

Once you find your combat logs, you need to isolate the one you need. The easiest way to do this is to arrange them in date order (you may need to select the "details" view rather than the "icons" or "list" view). Then look at your kill/lossmail, and find the first log with a time and date after the fight (dates are created when the log is closed, not when it is opened). This is the file you should be linking to the website.

Another clue will be the size of the log. Empty logs tend to only be 1KB, but logs with combat in them are usually an order of magnitude or so larger. The logs are saved in text format, and you can open them with note pad and edit them to a certain extent. This is a very useful feature, because it allows you to compare the combat log with the graph, and better understand what you are seeing.

Graphing the combat log

Once you have identified the log you need, you simply need to select it with the log tool on the website. With the correct log selected, hit "Graph It". As an example, I have graphed the combat log that contained the cyno-ship kill at the end of my first day in Hevrice.


Pretty disappointing, huh?

A couple of things to note right away, though. Although my log does not start with a fight, the graph does. So it ignores everything until the first combat damage. Equally, my log does not end with a fight, but again, the graph does. So it ignores everything after the last combat damage.

Because I happened to take some damage from a belt rat, the graph covers a long period of time, which has compressed the information. I could deal with this by creating an edited combat log that only contained one combat, but the easier thing to do is simply click and drag on the graph over the desired time frame. The graph automatically zooms.

I shall focus on the cyno ship kill, which gives me a zoomed in graph that looks like this.


Obviously, the annotations were added by me after the fact. If I want to zoom out, I just hit the button marked (rather intuitively) "Zoom Out".


What the heck are you looking at?

In order to make sense of the graph, we need to understand the way that the program actually functions, and the limitations we are working with. Dps, or damage per second, is an average of damage over some period of time. The formula is simple: Total damage within a certain time frame divided by the length of the time frame. So if I do 100 damage over 10 seconds, my dps is 10. Simple, right?

Well, not really.

Suppose I looked at that same fight, where I dealt 100 damage, but now decided to average that over a whole minute. Now, my dps is 100/60 = 1.67. Or suppose my rate of fire is once every five seconds. If I look at a three second period within the fight it may well be that my guns don't fire at all, so my dps is 0/3 = 0 dps.

So, choosing the right time frame is quite tricky. Clearly, a smaller time frame allows you to observe changes in dps more easily, while a larger time frame gives you more accurate averages. The creator of this program had to make some decisions here.

While I have no programming skills, a little reverse engineering on the numbers tells me the program works (roughly) as follows.

After detecting a combat, the program checks the log every second. It can't do this more often, because the log is only accurate to the nearest second. Each time it checks the log, it also looks at the three seconds before and the three seconds after the time being checked. It adds that damage together and takes an average.

DPS (time) = [T(-3)+T(-2)+T(-1)+T(0)+T(+1)+T(+2)+T(+3)]/8(ish)

Note that although the program is looking at seven different points in time, it divides by a number close to eight, rather than seven. This is because the combat log rounds to the nearest second, so when it looks at the point 3 seconds away, it actually captures everything up to 3.5 seconds away. So the time frame starts with a 1 second interval, looks 3.5 seconds ahead, and then 3.5 seconds behind, covering a total of about 8 seconds.

Of course, this is probably not the actual formula used. The accuracy of this formula changes slightly over the course of the battle, which suggests that the programmer used at least one additional variable. However, it is enough to give us a rough understanding of how the program works, so we can make sense of what we see on the combat graphs.


Interpreting the graph - my dps

Now that we understand the formula, we know that we have to take the dps calculated at the start and finish of each fight with a grain of salt. This is because the program is calculating the dps by looking at periods of time where I was not actually in combat, which of course pulls my average dps down. In the graph I posted above, I marked these periods as (A). When I look at the actual combat log, I can see that my first several shots at the Kestrel all hit for the exact same damage (as you would expect from missiles), despite the differently reported dps.

Now let's focus only on my damage for a moment.

The period marked (B) corresponds very roughly with the period where I was shooting at the Kestrel's shields. The transition will not be neat, for two reasons. First, there is likely to be one shot that "straddles" the shield armor transition, and second, the program looks ahead three seconds, so a pending drop in dps drags down your apparent dps slightly early.

The period marked (C) roughly corresponds with my shooting at the Kestrel's armor. Although I was using Caldari Foxfire, which is a good "all-rounder", it is still slightly less effective against armor, so I saw a dps drop. Again, the rise and fall do not correspond exactly, for the same reasons I mentioned before; there is likely to be a straddling shot, and the coming dps rise prematurely improves my apparent dps.

The period marked (D) roughly corresponds with shooting the Kestrel's structure. With no resists, my dps goes back up, subject to the end combat dps drop that is a function of the way the dps is calculated. Equally, part of my last shot is likely to be "wasted", as not all of the potential damage is required to destroy the Kestrel.

So, with a bit of effort, I can learn to read the story behind my dps graph, and this is also a useful basis for comparison with other strategies; when I next gank a cyno ship I will try to do so with Rage, and I can compare the dps values that I achieve.


Interpreting the graph - the station guns

Perhaps more interesting than my own dps is the dps of the station guns. Their dps is calculated the same way mine is, so it appears to be too low at the beginning and the end of the fight (marked (A)).

The section marked (B) roughly corresponds with the station guns hitting my shields, whereas the section marked (C) corresponds with armor (I never reached structure). You can see the drop in dps when they begin hitting my better resists. However, something else is also happening. My resists do not change throughout the fight, so the steady decline in dps must be the result of something more than hitting my armor.

Thinking back to the fight, I know that I opened fire and then began aligning to a celestial for a warp out once I could see that the Kestrel was going down - and the combat log confirms this. The section marked (D), then, roughly corresponds with my increasing transversal velocity relative to the gate guns.

This is very interesting; I was able to knock about 30 dps off the station guns simply by getting a little transversal velocity. I've wanted to start hitting pods for a while, and could it be that getting up to speed before opening fire buys me the time I need?

The danger with that strategy is that I might be carried out of range of the target before they are destroyed. Ideally, the celestial would be beyond my target so that I am first approaching them. That requires some setup, though, and I would lose the element of surprise.

Still, something to keep in mind if I naturally find myself in a situation that lends itself to that strategy.


Other issues

Although not demonstrated by this graph, there are one or two other things we know to expect from the program.

First, weapons with a slow rate of fire will have very spiky looking dps as the program looks at time periods that first contain several shots (or perhaps only one) and then time periods where fewer shots are included (or even none at all).

Second, weapons with travel times will also show erratic dps against fast moving targets, because the dps is not arriving smoothly. This will also create spikes, as some hits land closer together, and others further apart. That's not the programs fault, though; they are genuine dps variations based resulting from travel time.


Appendix - the combat log

I hope the walk through has been useful. I've included a cut-down version of the combat log so that people can compare it to the graph themselves. Equally, you can cut and paste it into a txt file and graph it yourself.


------------------------------------------------------------
  Gamelog
  Listener: Taurean Eltanin
  Session started: 2011.07.03 18:01:55
------------------------------------------------------------
[ 2011.07.03 18:02:27 ] (None) Jumping to Stargate (Hevrice) in Muetralle solar system
[ 2011.07.03 18:09:08 ] (None) Jumping to Stargate (Muetralle) in Hevrice solar system
[ 2011.07.03 18:12:56 ] (None) Jumping to Stargate (Hevrice) in Jovainnon solar system
[ 2011.07.03 18:17:09 ] (None) Jumping to Stargate (Jovainnon) in Hevrice solar system
[ 2011.07.03 18:19:59 ] (notify) Interference from the warp you are doing is preventing your sensors from getting a target lock on GASPAH's Kestrel.
[ 2011.07.03 18:20:04 ] (notify) Orbiting GASPAH's Kestrel (500m)
[ 2011.07.03 18:20:04 ] (notify) For initiating combat your security status has been adjusted by -0.1353.
[ 2011.07.03 18:20:04 ] (notify) Taurean Eltanin: You have foolishly engaged in criminal activity within sight of sentry guns and must suffer the consequences.
[ 2011.07.03 18:20:06 ] (notify) You have started trying to warp scramble GASPAH (Kestrel)[UGHZ]<N0VA>.
[ 2011.07.03 18:20:07 ] (combat) <color=0xffbbbb00>Your group of Caldari Navy Foxfire Rocket hits GASPAH (Kestrel)[UGHZ]&lt;N0VA&gt;, doing 199.8 damage.
[ 2011.07.03 18:20:07 ] (combat) <color=0xffbb6600>Gallente Sentry Gun barely scratches you, causing 132.5 damage.
[ 2011.07.03 18:20:07 ] (combat) <color=0xffbb6600>Gallente Sentry Gun hits you, doing 185.4 damage.
[ 2011.07.03 18:20:09 ] (combat) <color=0xffbbbb00>Your group of Caldari Navy Foxfire Rocket hits GASPAH (Kestrel)[UGHZ]&lt;N0VA&gt;, doing 198.0 damage.
[ 2011.07.03 18:20:09 ] (combat) <color=0xffbb6600>Gallente Sentry Gun aims well at you, inflicting 214.9 damage.
[ 2011.07.03 18:20:09 ] (combat) <color=0xffbb6600>Gallente Sentry Gun aims well at you, inflicting 237.9 damage.
[ 2011.07.03 18:20:10 ] (notify) Aligning to Hevrice - Star
[ 2011.07.03 18:20:12 ] (combat) <color=0xffbbbb00>Your group of Caldari Navy Foxfire Rocket hits GASPAH (Kestrel)[UGHZ]&lt;N0VA&gt;, doing 137.4 damage.
[ 2011.07.03 18:20:12 ] (combat) <color=0xffbb6600>Gallente Sentry Gun places an excellent hit on you, inflicting 98.4 damage.
[ 2011.07.03 18:20:12 ] (combat) <color=0xffbb6600>Gallente Sentry Gun places an excellent hit on you, inflicting 102.4 damage.
[ 2011.07.03 18:20:14 ] (combat) <color=0xffbbbb00>Your group of Caldari Navy Foxfire Rocket hits GASPAH (Kestrel)[UGHZ]&lt;N0VA&gt;, doing 137.4 damage.
[ 2011.07.03 18:20:14 ] (combat) <color=0xffbb6600>Gallente Sentry Gun barely scratches you, causing 43.5 damage.
[ 2011.07.03 18:20:14 ] (combat) <color=0xffbb6600>Gallente Sentry Gun hits you, doing 60.9 damage.
[ 2011.07.03 18:20:17 ] (combat) <color=0xffbbbb00>Your group of Caldari Navy Foxfire Rocket hits GASPAH (Kestrel)[UGHZ]&lt;N0VA&gt;, doing 157.3 damage.
[ 2011.07.03 18:20:17 ] (combat) <color=0xffbb6600>Gallente Sentry Gun places an excellent hit on you, inflicting 102.2 damage.
[ 2011.07.03 18:20:17 ] (combat) <color=0xffbb6600>Gallente Sentry Gun hits you, doing 69.4 damage.
[ 2011.07.03 18:20:18 ] (notify) For your part in the destruction of a Kestrel your security status has been adjusted by -0.5414.
[ 2011.07.03 18:20:18 ] (notify) Taurean Eltanin: You have foolishly engaged in criminal activity within sight of sentry guns and must suffer the consequences.
[ 2011.07.03 18:20:19 ] (combat) <color=0xffbbbb00>Your group of Caldari Navy Foxfire Rocket hits GASPAH (Kestrel)[UGHZ]&lt;N0VA&gt;, doing 249.7 damage.
[ 2011.07.03 18:20:19 ] (combat) <color=0xffbb6600>Gallente Sentry Gun lightly hits you, doing 54.2 damage.
[ 2011.07.03 18:20:19 ] (combat) <color=0xffbb6600>Gallente Sentry Gun aims well at you, inflicting 92.8 damage.
[ 2011.07.03 18:20:20 ] (notify) J5b Phased Prototype Warp Scrambler I deactivates as GASPAH's Kestrel begins to explode.
[ 2011.07.03 18:20:21 ] (notify) Caldari Navy Foxfire Rocket deactivates as the Item it was targeted at is no longer present.
[ 2011.07.03 18:20:22 ] (combat) <color=0xffbb6600>Gallente Sentry Gun hits you, doing 62.4 damage.
[ 2011.07.03 18:20:22 ] (combat) <color=0xffbb6600>Gallente Sentry Gun lightly hits you, doing 50.4 damage.
[ 2011.07.03 18:21:36 ] (notify) Loading the Rocket into the Missile Launcher Rocket; this will take approximately 10 seconds.
[ 2011.07.03 18:34:15 ] (info) No Character can be found with 'habarad' in the beginning of its name.
[ 2011.07.03 18:36:58 ] (notify) Warping to Hevrice V - Federal Freight Storage prior to making docking attempt
[ 2011.07.03 18:37:40 ] (notify) Requested to dock at Hevrice V - Federal Freight Storage station
[ 2011.07.03 18:37:40 ] (notify) Your docking request has been accepted. Your ship will be towed into station.
[ 2011.07.03 18:37:41 ] (notify) Your ship is realigning its magnetic field, please wait a moment.