Monday, 12 September 2011

Tuskers v Stone Circle & Back to Yarr (part 2)


The hunt (continued):

As I said in my last post, trouble was brewing back in Hev. That trouble took the form of Xirad, and a massively tanked Amarr battleship.

Xirad was camping our station. Again. His ship, in itself, was not a problem; despite the massive buffer tank, we had enough firepower to destroy him before he could deagress and dock up. However, Xirad is almost always acting as bait for a larger fleet - sometimes a MUCH larger fleet.

So our fleet held position just inside the first wormhole while another Tusker undocked from the station to act as bait. Once Xirad opened fire on our ship, we jumped into Hevrice, and immediately warped to the station.

When we saw local spike half way through our warp, we knew that Back to Yarr was not planning on disappointing us. We landed slightly ahead of them, but not so early that it made a difference; roughly eight heavy ships - battlecruisers and battleships - landed around their compatriot. Once the drones launched, I felt like I was swimming in a sea of red.

I would love to tell everyone that my masterful tackles turned the tide, but the truth is far more embarassing. I initially pointed Xirad, but our FC - not unnaturally - felt that the bait ship was a poor choice of primary, and named a new target. By coincidence, he happened to name the ONE ship in the enemy fleet that was not an outlaw, and I pointed it without thinking. I was immediately eaten by the station guns.

2011.08.29 22:27:00

Victim: Taurean Eltanin
Corp: The Tuskers
Alliance: NONE
Faction: NONE
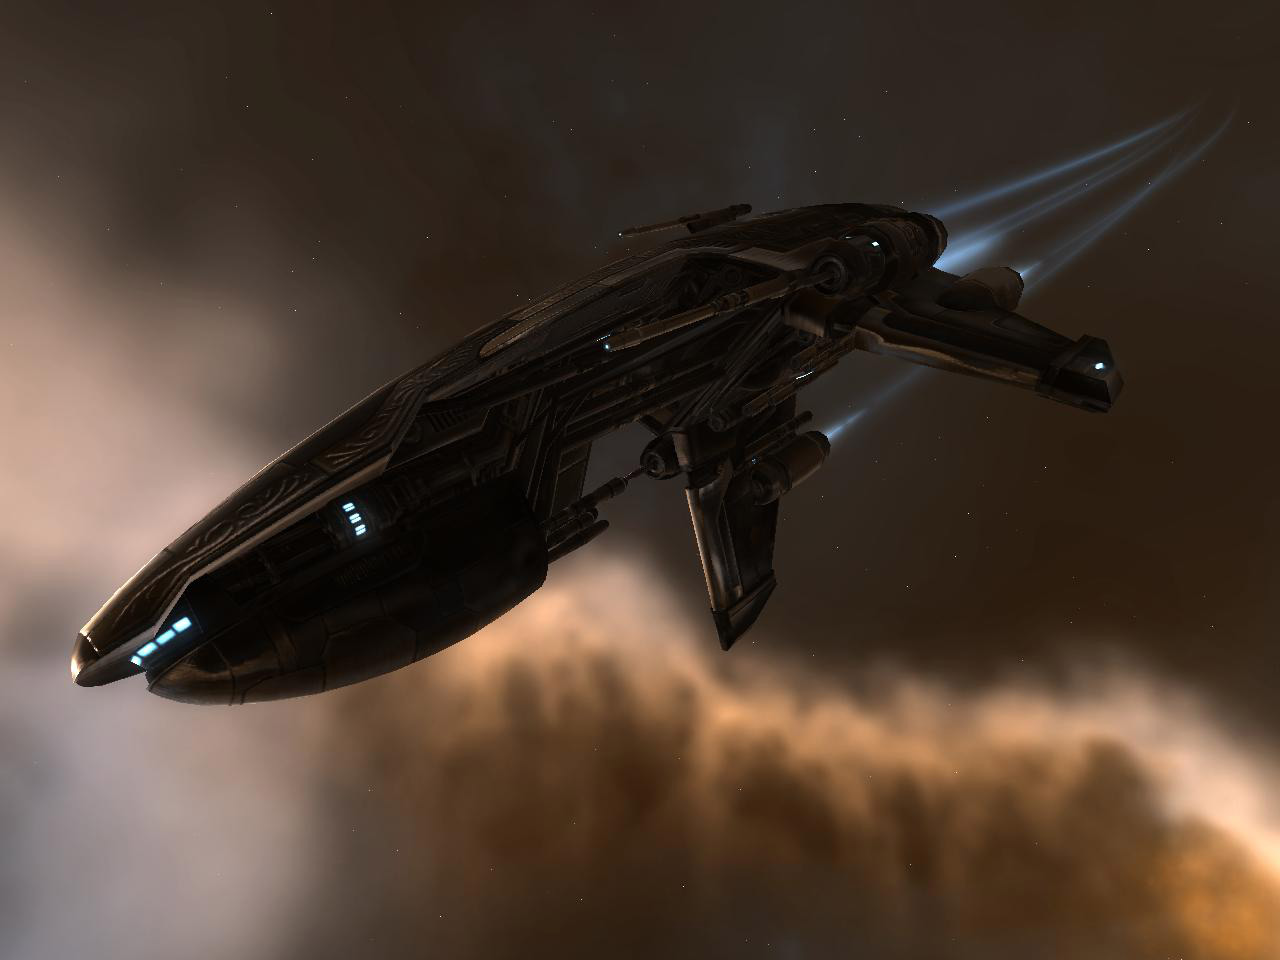
Destroyed: Malediction
System: Hevrice
Security: 0.4
Damage Taken: 1317

Involved parties:

Name: Enigma B (laid the final blow)
Security: -3.8
Corp: 4CPO
Alliance: NONE
Faction: NONE
Ship: Hurricane
Weapon: Hornet EC-300
Damage Done: 0

Name: Gallente Sentry Gun / Federal Freight
Damage Done: 1317

Destroyed items:

Core Probe Launcher I
Damage Control II
Rocket Launcher II, Qty: 2
Small Targeting System Subcontroller I
Caldari Navy Foxfire Rocket, Qty: 141
Small Ionic Field Projector I
Caldari Navy Foxfire Rocket, Qty: 829 (Cargo)

Dropped items:

Rocket Launcher II
Catalyzed Cold-Gas I Arcjet Thrusters
Warp Disruptor II
Core Scanner Probe I, Qty: 8
Adaptive Nano Plating II
Micro Capacitor Battery I
Nanofiber Internal Structure II

Some guy with an uncontrolled ECM drone got himself on a killmail.

Mortified at being removed from the battle so quickly, I warped to a safe (I figured that trying to dock to reship was probably a mistake). The remaining fleet drove Yarr off the station, although without destroying the bulk of their force.

Recovering my mods, I logged out for the night. My part in the story was over; my fleet ship had been destroyed, and it was late - I had been returning to Hevrice to log off when I saw the initial cyno go up outside the wormhole.

An anticlimatic way to end a tale with so much promise? Sure. Back to Yarr was still threatening Hev and Stone Circle still promised riches beyond imagining to those who dared to invade their space. But this is New Eden, and a pirate's life is full of anticlimatic moments. I left those adventures to other Tuskers.


Afterthoughts:

This was my first real test of my fleet tackler, and I am generally pretty happy with the results. I felt that I actually played a useful role in and around the wormhole, and if I had not gotten myself blown up at the station, I probably could have added a +1 to Yarr's casualties just by holding one of them in the fight.

For those looking at my fit, I know it's far from ideal. That's because my interceptor fitting skills are far from ideal. General improvements aside, there are some changes that I would like to try with my next interceptor.

I would like to try a sensor booster over the sensor rigs. When I was trying to snag scout ships, I did not need the extra range, I needed the extra locking speed. A sensor booster would allow me to adapt my pointing setup in response to those circumstances - sacrificing some range for boosted lock times.

I had also been talked out of putting an armor repair system on my interceptor, and for good reasons. However, this made me far less useful over the course of a long engagement. Holding the Cynabal while waiting for the fleet nearly put me in structure. I then needed to take a break to go back to the station for repairs - but only after waiting out my GCC. This put me out of action for about 20 min.

If I had an armor repair system, even though I could only pulse it, I would have lasted longer, and I would also have been back to full strength within a minute or two of the fight ending. Much more useful. An alternative would be a MSE, which regenerates naturally. Right now my armor skills are so much higher than my shield skills I think I will go with the repair unit, but as my shield skills improve, I'll probably go with the MSE as it is cap independent and leaves me low slots for speed mods. It does cost me an ewar slot, though.

Friday, 9 September 2011

Tuskers v Stone Circle & Back to Yarr (part 1)


The hunt:

It all started when I popped a cyno ship. That's what really kicked it off.

The cyno went up in Hev, and looked just like every other cyno that goes up in Hev. We all saw it, but I got their first, which isn't surprising; station guns deter most frigate pilots, and my little Vengeance warps much faster than the larger predators that roam the space lanes.

What none of us realised, until I landed on the cyno ship, was that this ship wasn't at a station. Instead, I found myself gazing into the angry eye of a wormhole. That didn't stop me opening fire, of course.

2011.08.29 21:00:00

Victim: XBLazeLX
Corp: Stone Circle
Alliance: W-Space
Faction: NONE
Destroyed: Probe
System: Hevrice
Security: 0.4
Damage Taken: 611

Involved parties:

Name: Taurean Eltanin (laid the final blow)
Security: -10.0
Corp: The Tuskers
Alliance: NONE
Faction: NONE
Ship: Vengeance
Weapon: Foxfire Rage Rocket
Damage Done: 611

Destroyed items:

Cynosural Field Generator I
Expanded Cargohold II, Qty: 2
Liquid Ozone, Qty: 1110 (Cargo)
Bookmark, Qty: 3 (Cargo)

Dropped items:

Bookmark, Qty: 3 (Cargo)

Look closely at that killmail. Look closely at the "Dropped items." That's right. Bookmarks. Or, to a pirate, a treasure map!

Adding the bookmarks to my own log, I saw that they were all bookmarks from W-space. Hoping against hope, I jumped through the wormhole.

The first bookmark corresponded to my new position just inside the wormhole. The next bookmark took me to a second wormhole that led deeper into W-space. Jumping through that, I found myself on the third bookmark. And there, on Dscan, was their POS.

X marks the spot.

Immediately letting my corp mates know what I had found, I started heading back to K-space while the Tuskers began forming an expeditionary fleet. On my return to Hevrice I passed several cloaked probing ships, presumably the scouts for Stone Circle.

I tried to engage them, but my lock time was too slow. As soon as I reached K-space again I reshipped to my Malediction; I had sensor boosting rigs installed which might give me the edge I needed to lock the probing ships.

Once reshipped, I jumped back to the wormhole entrance, both to keep an eye on it and to try and snag some scouts while the fleet formed up. I was still too slow to lock them before they jumped, but they were not the only traffic. Perhaps in an effort to secure the wormhole, a Cynabal jumped in, followed by a Tengu.

Pointing the Cynabal - he had jumped in first - I called for backup. I was taking a pounding from the Tengu's missiles, and I was not certain I would be able to hold point. However, we managed to get a few Hurricanes to warp in, but Stone Circle managed to slip back into the wormhole; we did not yet have enough dps to burn them down fast.

To ensure no further breakout attempts (and since secrecy was no longer a valid approach) the fleet formed up on the wormhole. When Stone Circle tried again, we were ready, and the Tengu did not escape.

2011.08.29 21:53:00

Victim: Latuuray
Corp: Stone Circle
Alliance: W-Space
Faction: NONE
Destroyed: Tengu
System: Hevrice
Security: 0.4
Damage Taken: 15809

Involved parties:

Name: Tsubutai (laid the final blow)
Security: -9.8
Corp: The Tuskers
Alliance: NONE
Faction: NONE
Ship: Hurricane
Weapon: 425mm AutoCannon II
Damage Done: 11707

Name: Khronoin
Security: -9.8
Corp: The Tuskers
Alliance: NONE
Faction: NONE
Ship: Hurricane
Weapon: Hurricane
Damage Done: 3125

Name: Nupe
Security: -9.9
Corp: The Tuskers
Alliance: NONE
Faction: NONE
Ship: Hurricane
Weapon: Hurricane
Damage Done: 977

Name: Taurean Eltanin
Security: -10.0
Corp: The Tuskers
Alliance: NONE
Faction: NONE
Ship: Malediction
Weapon: Warp Disruptor II
Damage Done: 0

Destroyed items:

Y-S8 Hydrocarbon I Afterburners
Tengu Offensive - Accelerated Ejection Bay
Tengu Defensive - Supplemental Screening
Medium Core Defence Field Extender I, Qty: 3
Tengu Electronics - Dissolution Sequencer
Tengu Propulsion - Fuel Catalyst
Ballistic Control System II, Qty: 2
Heavy Missile Launcher II, Qty: 2
Scourge Fury Heavy Missile, Qty: 63
Tengu Engineering - Augmented Capacitor Reservoir
Nanite Repair Paste, Qty: 458 (Cargo)
Caldari Navy Scourge Heavy Missile, Qty: 1000 (Cargo)
Ballistic Control System II (Cargo)
Thunderbolt Fury Heavy Missile, Qty: 2064 (Cargo)

Dropped items:

Invulnerability Field II, Qty: 2
Damage Control II
Large F-S9 Regolith Shield Induction
Photon Scattering Field II
Warp Scrambler II
Ballistic Control System II
Heavy Missile Launcher II, Qty: 4
Scourge Fury Heavy Missile, Qty: 63
Scourge Fury Heavy Missile, Qty: 4085 (Cargo)
Caldari Navy Thunderbolt Heavy Missile, Qty: 1000 (Cargo)

The Tengu did not jump in alone, however, and I believe we also managed to down a Dramiel, though I was not on the killmail. Instead, I (and most of the fleet) had been focusing on the larger ships, but they were rescued by a Falcon, fleeing back into the wormhole.

Now at fighting strength, the Tusker fleet followed them into W-space. I followed one jump behind to try and point scouts and anyone trying to slip around the fleet. This meant that I was not present at the next engagement, where we again forced Stone Circle back, this time to their home system.

Assembling on the inner wormhole, we prepared for a final assault. At the last minute, however, the fleet was recalled; trouble was brewing in Hevrice.

To be continued.

Thursday, 8 September 2011

Fitting a Vengeance: Refining my Fit


As I get closer to maxing out my Vengeance skills, I'm looking more and more at flying a maxed out Vengeance. Alright, perhaps not "maxed out" - I'm still scratching a living off of my piracy - but certainly an upgraded fit.

The fits are all quite similar, so I'll cover the obvious stuff first:

Highs: 4 Rocket Launcher II
Mids: Full Tackle
Lows: Damage Control II, Adaptive Nano Plating II

This leaves me with two "open" low slots, and two rigs.


Standard Vengeance

This is my current fit, and I include it as a baseline. It puts an EANMII and a Small Armor Repairer II in the lows, an a Small Anti-thermic Pump and Small Warehead Calefaction Catylist in the rig slots. Like all my fits, it's cap stable. All DPS figures calculated with Rage rockets.

DPS: 116 (136 overheated)
HPS: 113 (146 overheated  - although not cap stable)
EHP: 9937
Speed: 818 m/s (1064 m/s overheated)


Tank Fit

This fit puts an EANMII and a Centii C-type Small Armor Repairer in the lows, and a Small Anti-thermic Pump and a Small Capacitor Control Circuit II in the rig slots.

DPS: 105 (124 overheated)
HPS: 140 (181 overheated!)
EHP: 9937
Speed: 818 m/s (1064 m/s overheated)

A significant damage reduction in exchange for massive active tank and tremendous capacitor regeneration; having flown with the T1 CCC, I know that it is very difficult to neut me out with a single neut. Moving to a T2 CCC, the it would take two neuts to shut down my armor repairer, and everything else continues to function just fine.


Balanced Fit

This fit copies the Standard Fit, but upgrades the repairer to a Coreli C-type and the Calefaction Catylist to T2. No other changes.

DPS: 121 (143 overheated)
HPS: 124 (161 overheated - not cap stable)
EHP: 9937
Speed: 818 m/s (1064 m/s overheated)

Effectively, a modest dps and hps boost over what I am currently flying.


DPS Fit

A Balistic Control System II and a Coreli C-type Armor Repairer in the Lows, along with a Small Anti-thermic Pump and Small Warhead Calefaction Catylist II in the rig slots.

DPS: 147 (173 overheated!)
HPS: 98 (127 overheated - not cap stable)
EHP: 8594
Speed: 818 m/s (1064 m/s overheated)

This fit trades over 1k EHP and a significant chunk of it's active tank to achieve a level of dps you don't usually find on a Vengeance.


My thoughts

Right now, I'm leaning towards the "Balanced Fit". That's not terribly surprising, because it's very similar to what I'm flying now; it's in my comfort zone.

However, the other two fits have obvious advantages. The Tank Fit wins wherever your own dps is irrelevant, such as when you are burning back to a gate after jumping into an instant-lock camp. It is also excellent for wearing down buffer fit ships, and most T1 and T2 frigates cannot break it's tank.

On the other hand, the Tank Fit invests a great deal in it's tank, and does not hold up as well in situations where the tank is not relevant, such as where multiple neuts are being applied, or you are trying to burn down the enemy before their backup arrives. Here, of course, the DPS Fit shines. It's also the only fit that can reliably break a Drake's passive tank solo - Azual puts the typical Drake's peak recharge at around 150HPS.

Given two extremes, I tend to gravitate towards a middle ground, and so it is with fits. Still, I throw the floor open for comments, as there are almost certainly factors I have not considered.

Wednesday, 7 September 2011

Vengeance et alia v Jaguar & Ishkur


The hunt:

A fellow Tusker had told us that there was a frigate gang in Agoze (that included a Dramiel and two Jags), and that this gang was looking for a fight. Several of us quickly formed a frigate gang of our own, and raced to the scene.

We decided that I would act as bait by sitting at a belt. Subtle, right? Actually, I would be aligned to another celestial, and I would warp as soon as company arrived. This would give me a chance to scope out the other gang. If it were manageable, I could let them "catch" me at the second celestial, and the rest of the Tuskers would jump in.

Warping to the belt, I kept an eye on my D-scan. There were several assault frigates in local, but I could not see the Dram. Perhaps he was docked up? I did not have much time to ponder this before a Jaguar jumped in.

I warped to the second celestial, keeping an eye on my overview for the Jag's backup, but saw nothing. They clearly suspected bait, and wanted to test the waters before committing.

That seemed reasonable, so I decided to let the Jag catch me when I came out of warp. I also reduced my Dscan to short range only, so I would see other ships arriving. The Jaguar actually assumed I was more cunning than I actually am; he warped to the celestial at 100km, whereas I had warped to zero.

Oh, well. I turned towards him and prepared to engage, while the Jaguar did the same. We had not even reached point range when my short range scans showed another assault ship within a couple of AU, so I called in my fellow Tuskers as backup.

The Jaguar and I engaged; I had plenty of time to select ammunition, and he seemed to have trouble breaking my tank. Before we could really test each other, however, my backup arrived, and the Jag was facing a 3v1.

Handling it like a man, the Jag immediately switched fire to something a little softer. He also must have called for backup, because an Ishkur landed shortly thereafter (and it's worth noting that this was NOT the assault ship I had seen on Dscan when I called for backup - he must have just been passing through).

They must have overheated everything, because they burned into our Wolf at an alarming rate. Despite the four Tuskers pouring fire into them, the plucky duo managed to down Grog Drinker!

2011.08.28 16:18:00

Victim: Grog Drinker
Corp: The Tuskers
Alliance: NONE
Faction: NONE
Destroyed: Wolf
System: Agoze
Security: 0.2
Damage Taken: 3636

Involved parties:

Name: Xi 'xar (laid the final blow)
Security: -8.3
Corp: Mise en Abyme
Alliance: NONE
Faction: NONE
Ship: Jaguar
Weapon: 200mm AutoCannon II
Damage Done: 2200

Name: Aeron Llyr
Security: -6.6
Corp: Mise en Abyme
Alliance: NONE
Faction: NONE
Ship: Ishkur
Weapon: Warrior II
Damage Done: 1436

Destroyed items:

Damage Control II
Republic Fleet Fusion S, Qty: 360
Tracking Enhancer II
125mm Gatling AutoCannon II, Qty: 2
Small Anti-Explosive Pump I
Small Anti-Kinetic Pump I
Barrage S, Qty: 1512 (Cargo)
Republic Fleet Phased Plasma S, Qty: 800 (Cargo)

Dropped items:

Gyrostabilizer II
Republic Fleet Fusion S, Qty: 360
Small Energy Neutralizer II
125mm Gatling AutoCannon II, Qty: 2
400mm Reinforced Rolled Tungsten Plates I
J5b Phased Prototype Warp Scrambler I
1MN Afterburner II
Republic Fleet EMP S, Qty: 1600 (Cargo)

Unfortunately for our opponents, they then made what was probably their first mistake of the fight; they called me as primary. Now, I'm sure that they would have broken my tank in time, but time was not on their side, as the Jaguar pilot soon joined Grog Drinker in Valhalla.

2011.08.28 16:18:00

Victim: Xi 'xar
Corp: Mise en Abyme
Alliance: NONE
Faction: NONE
Destroyed: Jaguar
System: Agoze
Security: 0.2
Damage Taken: 4957

Involved parties:

Name: Taurean Eltanin (laid the final blow)
Security: -10.0
Corp: The Tuskers
Alliance: NONE
Faction: NONE
Ship: Vengeance
Weapon: Phalanx Rage Rocket
Damage Done: 3208

Name: Grog Drinker
Security: -10.0
Corp: The Tuskers
Alliance: NONE
Faction: NONE
Ship: Capsule
Weapon: 125mm Gatling AutoCannon II
Damage Done: 1547

Name: IK Thel
Security: -2.9
Corp: The Tuskers
Alliance: NONE
Faction: NONE
Ship: Jaguar
Weapon: Foxfire Rocket
Damage Done: 133

Name: Serpentis Chief Watchman / Serpentis Corporation
Damage Done: 69

Destroyed items:

200mm AutoCannon II
Damage Control II
Gyrostabilizer II
Small Core Defence Field Extender I, Qty: 2
Tracking Enhancer II
Republic Fleet Fusion S, Qty: 212
1MN Afterburner II
Republic Fleet Phased Plasma S, Qty: 730 (Cargo)
Republic Fleet EMP S, Qty: 360 (Cargo)

Dropped items:

200mm AutoCannon II, Qty: 2
Republic Fleet Fusion S, Qty: 106
X5 Prototype I Engine Enervator
Medium Shield Extender II
J5b Phased Prototype Warp Scrambler I
Barrage S, Qty: 460 (Cargo)

That left just the Ishkur, and he was now facing a 3v1, with his primary rapidly repping up to full armor. It worked out about as well as could be expected.

2011.08.28 16:19:00

Victim: Aeron Llyr
Corp: Mise en Abyme
Alliance: NONE
Faction: NONE
Destroyed: Ishkur
System: Agoze
Security: 0.2
Damage Taken: 3579

Involved parties:

Name: Taurean Eltanin (laid the final blow)
Security: -10.0
Corp: The Tuskers
Alliance: NONE
Faction: NONE
Ship: Vengeance
Weapon: Phalanx Rage Rocket
Damage Done: 463

Name: Kaal Redrum
Security: -9.8
Corp: The Tuskers
Alliance: NONE
Faction: NONE
Ship: Ishkur
Weapon: Warrior II
Damage Done: 2607

Name: IK Thel
Security: -2.9
Corp: The Tuskers
Alliance: NONE
Faction: NONE
Ship: Jaguar
Weapon: Jaguar
Damage Done: 509

Name: Grog Drinker
Security: -10.0
Corp: The Tuskers
Alliance: NONE
Faction: NONE
Ship: Capsule
Weapon: J5b Phased Prototype Warp Scrambler I
Damage Done: 0

Destroyed items:

Small Hybrid Collision Accelerator I
Federation Navy Antimatter Charge S, Qty: 92
Small Hybrid Burst Aerator I
Energized Reactive Membrane II
Light Ion Blaster II, Qty: 2
Damage Control II
1MN Afterburner II
Optimal Range Disruption
Null S, Qty: 718 (Cargo)
Tracking Speed Disruption (Cargo)
Hobgoblin II, Qty: 4 (Drone Bay)

Dropped items:

Warp Scrambler II
Federation Navy Antimatter Charge S, Qty: 184
Balmer Series Tracking Disruptor I
Light Ion Blaster II
Small Diminishing Power System Drain I
Small Armor Repairer II
Federation Navy Antimatter Charge S, Qty: 938 (Cargo)
Void S, Qty: 500 (Cargo)

Many a "good fight" was dropped in local.


Afterthougths:

These guys really did their corp proud. They jumped into a Tusker ambush outnumbered 2:1 and managed to seriously bloody our nose. If they had moved on to either our Jag or our Ishkur, they might have even taken a second ship with them.

On reflection, I wish we had been able to offer a more even fight; they were quality pilots who would have really put us to the test (or me, at least). Unfortunately, our intitial intel and subsequent movements in local led us to believe that they were part of a larger gang until the fight was well under way.

Because we lost the Wolf, we were not expecting the fight to be profitable; any loot would go to Grog Drinker to reimburse him. However, Lady Luck decided to bestow her favours on us that day, and EACH of the three wrecks dropped an intact armor plate as salvage. We each walked away with about 20million ISK in profit.

Note to self: salvage all T2 wrecks!


Tuesday, 6 September 2011

The next steps.


Recently a number of people have asked where (and when) I plan to go from my Vengeance hull. I've been a little reticent with my answers, simply because I recognize that my views might change. For what it's worth, though, here is the current plan:

Vengeance > Purifier > Sacrilege > HAM Legion/Damnation

Yes, there is a method to my madness.


Vengeance

I'm committed to getting every relevant skill to level V. This is something I want to do with every ship on the above list, but I sometimes get the impression that people don't really believe me. They ask me when I'm moving on, or when I'm going to train battle cruisers.

The answer is, I'm not. This is a process that will take months. With complete focus, I'll probably be finished some time after Christmas. Maxing out your first ship takes a long, long time.

When I get closer to my goal, I'm going to invest in T2 rigs and a faction repair system (I'm trying to build up a cheap stockpile in the meantime - if anyone has a source for reasonably priced small coreli c-type armor repair systems, hook a pirate up!). That won't happen until my missile and tanking skills are maxed out, though, which will be some time in October.


Purifier

Now, after coming across as all hard core and super focused, I'll relent a little. Just like every other player, I want my new shiny toys, so I'll be interspersing some skills for the Purifier with my Vengeance skills. Because of my past focus, I still won't be able to sit in a Purifier until October, as I have a number of prerequisites to cover, but it does mean that I'll be test-flying the ship before the Vengeance is finished - and that it will take me longer than planned to max out my Vengeance (although most of those skills will also benefit the Purifier).

There are a number of reasons that I've chosen the Purifier as my next ship. Some of these are obvious: it's cheap (compared to the alternatives), it builds on my soon-to-be-perfect missile skills, and it's perfect for my favourite thing in Eve - soloing above class ships.

However, there are some other important considerations. First, I need to be able to make a lot more money if I want to be able to fly T2/T3 cruisers one day. While I am winning progressively more and more of my fights as my Vengeance skills creep towards maximum, there is an upper limit on the profit a Vengeance can make; it just can't take on the "prize ships" without the help of a gang.

Enter the Purifier. With the ability to hunt down and kill battle cruisers and battleships, a well flown Purifier can potentially make much more money, laying the financial groundwork for later ships.

Equally, I would finally be able to contribute some meaningful dps to Tusker gangs, which is an area where I feel I have been letting the team down.


Sacrilege

The Vengeance's big brother, it builds on all the skills I should already have maxed out: missiles, resistance tanking, and cap management. It should not actually take me too long to max this ship out, because the majority of the relevant skills should already be at V.

Not just able to contribute to a gang, but be part of the gang, up to and including fighting on gates and stations, the Sacrilege will round out the ships I can bring to the team. Although not a shield tanked BC, I hope that a resistance tanked Sacrilege will be able to keep up with the Harbingers/Hurricanes, as well as contribute similar dps. I really look forward to flying this ship.


HAM Legion/Damnation

A long, long way off, but probably the "best" ships I'll ever be tempted to fly. Again, they build on my core skills, making my training very efficient in the long run. I'm not sure where or how I would fly these; they are simply too far beyond my experience. Currently more of a theoretical goal than something I am devoted to acheiving, I don't see myself sitting in either of these ships for at least a year.

Monday, 5 September 2011

Vengeance v Wolf


The hunt:

I was passing through Hevrice, moving from a northern roam to a southern roam, when I saw an interceptor on D-scan. Quickly scanning it down, I jumped in. En route, I loaded Caldari Navy Phalanx, which is superior to Rage when fighting fast targets, and also has greater range.

The interceptor was leaving as I landed. Unfortunately, I did not catch his destination, so I quickly started to scan him down again. Before I could do so, however, a Wolf landed on the belt with me!

It was toothslayer, also hunting the interceptor. He was not about to waste his opportunity for a rematch, though; he locked me and moved to intercept.

At this point, I had a split second to make three very important decisions:

1) Was I going to stay and fight, or was I going to try and warp out? This one was easy. Of course I was staying.

2) Was I going to reload, or go with what I had in the launchers? This was much tougher. Although my damage type was probably correct, Caldari Navy rockets don't pack the same punch as Rage rockets against targets slower than 600m/s (after being webbed). Switching ammo would leave me with a 10 second dps hole, though. I decided to go with the ammo I had loaded.

3) Was I going to fight up close, or at range? Another tough one. Wolves get a range bonus, but fighting in his falloff should still reduce his dps slightly. It might also push him to use barrage, which hit my best resists. On the other hand, I could try getting under his guns, because Wolves have no tracking bonus. Of course, that's why some Wolves use high tracking guns and tracking rigs. Without time to look at his probable fit, I decided to stay at range, largely because I already had range on my side.

So I moved into a wide orbit - about 5km, which actually left me about 7km from him due to my angular momentum. Scraming and webbing him, I opened fire.

Toothslayer returned the favour, and I was shocked by just how much damage a Wolf can put out when it wants to. I immediately overheated my guns and my repair system, knowing that this would be a very close fight.

I wish I could say that I did something clever at this point, but all I could do is watch things play out. I had complete control of the range, and it was a straight up damage race. A very, very close race.

We both entered structure together. I was aware that I could use my range dictation to escape, but that's just not how I fly. Unless a fight is obviously hopeless, I'm in it all the way.

So, deeper into structure we went. One moment I would be winning, when I received a boost from the repair system, and the next I would be losing, as his dps brought me back down. In the end, though, the timing of my repair cycles was such that I exploded an instant before him - he was between ten and twenty percent structure when I went down.

2011.08.28 15:51:00

Victim: Taurean Eltanin
Corp: The Tuskers
Alliance: Unknown
Faction: Unknown
Destroyed: Vengeance
System: Hevrice
Security: 0.4
Damage Taken: 3721

Involved parties:

Name: toothslayer (laid the final blow)
Security: -9.9
Corp: Guild of Assassins
Alliance: NONE
Faction: NONE
Ship: Wolf
Weapon: 150mm Light AutoCannon II
Damage Done: 3375

Name: Serpentis Chief Patroller / Serpentis Corporation
Damage Done: 346

Destroyed items:

Caldari Navy Phalanx Rocket, Qty: 27
Rocket Launcher II, Qty: 2
Phalanx Rage Rocket, Qty: 800 (Cargo)
Foxfire Javelin Rocket, Qty: 600 (Cargo)
Foxfire Rage Rocket, Qty: 800 (Cargo)
Caldari Navy Gremlin Rocket, Qty: 600 (Cargo)
Gremlin Rage Rocket, Qty: 800 (Cargo)
Small Anti-Thermic Pump I
Small Capacitor Control Circuit I
Thorn Rage Rocket, Qty: 800 (Cargo)
Small Armor Repairer II

Dropped items:

Caldari Navy Phalanx Rocket, Qty: 81
Energized Adaptive Nano Membrane II
Damage Control II
Rocket Launcher II, Qty: 2
Caldari Navy Thorn Rocket, Qty: 600 (Cargo)
Caldari Navy Foxfire Rocket, Qty: 600 (Cargo)
Warp Scrambler II
X5 Prototype I Engine Enervator
Caldari Navy Phalanx Rocket, Qty: 400 (Cargo)
Adaptive Nano Plating II
1MN Afterburner II

Sadly, a lag storm meant that I also lost my pod, although it was a pvp clone with only two +2 implants, so the loss was manageable.


Afterthoughts:

A real nail biter of a fight. After the fight I asked in corp chat whether I should have gone in close or stayed at range, and opinions were divided. If I chose poorly, then, it least it was not an obvious mistake.

The fight was so very, very close to being a win. If I had time to change ammo before the fight, I probably would have won. If I had not had rat aggro, I probably would have won. If I had a dps rig instead of a cap rig, I probably would have won. So very,very close.

While my next hull is already rigged for cap, the hull after that will be rigged for dps. It's time I actually gave that setup a try.

Friday, 2 September 2011

Profit Account for August 2011

August has been a less active month for me (as I suspect it has been for most players in the northern hemisphere), but not a less profitable one. In addition to flying more conservatively and (with one exception) more sensibly, I was fortunate enough to recover modules and salvage on all my losses, which helped minimize my monthly expenditure. 

It's worth remembering that this approach to piracy was inspired by Kishin's blog, which is very much worth checking out if you have any interest in the financial side of piracy, or sustainable pvp generally. I am happy to take suggestions about the kind of data I should be looking for, as well as ways of presenting that data.

Finally, for those interested in a comparison, last month's figures can be found here.

Schedule of Income

Solo Income

Dropped modules and other loot
ISK 68,587,658

Ransoms
Nil

Total Solo Income
ISK 68,587,658


Group Income

Dropped modules and other loot
ISK 110,758,750
Loot split from Assault Ship roam in July (ISK 69,508,750)
Vengeance et alia v Curse loot split (ISK 5,500,000)
Vengeance et alia v Hyperion (ISK 4,600,000)
Vengeance et alia v Jaguar & Ishkur (ISK 24,250,000)
Vengeance et alia v Typhoon (ISK 5,000,000)
Vengeance et alia v Hurricane (ISK 1,900,000)

Ransoms
Nil

Total Group Income
ISK 110,758,750

Total Income
ISK 179,346,408

Schedule of Expenses

Solo Expenses

Reasonable losses (see note 1)
ISK 15,179,174
Vengeance (ISK 7,679,174) - Vengeance v Wolf; awesome fight. Mods recovered.
Capsule with two +2 implants (ISK 7,500,000)

Avoidable losses (see note 2)
Nil

Total Solo Expenses
ISK 15,179,174

Group Expenses

Reasonable losses (see note 1)
ISK 9,600,979
Vengeance (ISK 9,600,979) - Vengeance v Harbinger & Navy Stabber; was acting as bait and could not hold out until the cavalry arrived. Mods recovered.

Avoidable losses (see note 2)
ISK 6,574,660
Malediction (ISK 6,574,660) - Tuskers v Stone Circle & Back to Yarr. Death via station guns. Mods recovered.

Total Group Expenses
ISK 16,175,639 

Total Expenses
ISK 31,354,813


Schedule of Profit (Loss)

Total Income
ISK 179,346,408
Less

Total Expenses
ISK 31,354,813

Net Profit (Loss) (see note 3)
ISK 147,991,595


Appendix 1: Estimated Income Pending


Tuskers v Stone Circle & Back to Yarr (Tengu) loot split
ISK ??,???,???

Unsold solo roam loot
ISK 5,000,000


Total Income Pending 
ISK 5,000,000


Appendix 2: Explanatory Notes


Accounting basis

This profit account has been prepared on the basis of income received and expenses incurred. That is, income is only recorded when the ISK has actually been deposited in my wallet and the expense of purchasing a ship is recorded only when the ship has been destroyed.

All accounts have to make decisions about when, and how, to record income, and each method has it's own advantages and disadvantages. I prefer the income received basis because it takes the guesswork out of preparation, but I recognize that this means that there will be cases where a profitable month may show a loss, simply because the bulk of the faction loot is still on contract in Jita. The reverse is also true.

However, as long as the accounts are consistent, long term trends in profitability can be reliably monitored, especially if we remain alert to the possible biases. Additionally, estimates of carried over income will appear in appendix 1.

All figures are rounded to the nearest ISK, and are derived from character and alt wallets unless otherwise stated.


Capital & Liquidity

These accounts also do not address issues of liquidity or capital. Although I may be profitable, for example, I may have no ISK in my wallet because I have converted those funds into ships and modules.

I have chosen not to address capital or liquidity for two reasons. First, this adds a great deal of additional work to the accounts, for very little additional gain. Capital and liquidity matter in the real world, where a corporation's ability to offer security for debt (capital) and meet the interest payments on that debt (liquidity) are critical issues. New Eden, mercifully, does not work like that.

Second, it would provide just a little too much information about me. If I ever have to pay a ransom, I'd really prefer that whomever is ransoming me cannot see, to the nearest ISK, how much money I have!


Notes

Note 1: "Reasonable losses" includes all losses where it was reasonable for me to engage the target and no fundamental play error occurred during the fight. Battle Clinic costs, net of insurance, are used for simplicity, and dropped modules count as destroyed for the purpose calculating these costs, unless those modules were recovered after the fight. Loot from previous fights, if any, are excluded from the total costs - no ISK was spent on obtaining these items, so no ISK is lost when they are destroyed.

Note 2: "Avoidable losses" includes all losses where it was unreasonable for me to engage the enemy or a fundamental play error occurred during combat. Battle Clinic costs, net of insurance, are used for simplicity, and dropped modules count as destroyed for the purpose calculating these costs, unless those modules were recovered after the fight. Loot from previous fights, if any, are excluded from the total costs - no ISK was spent on obtaining these items, so no ISK is lost when they are destroyed.

Note 3: In this line, a figure in brackets indicates a loss rather than a profit.

 
Appendix 3: Comments & Criticism


Despite less time online, I actually turned a higher profit - almost seven times last month's profit, in fact. Before I get too excited, however, it's worth observing that roughly half my profit for the month was an unpaid loot split carried over from July.

I've immediately rolled my profit into another batch of Vengeances and mods; to just have the money sitting there would temp me to do something stupid, like buy expensive implants or a faction ship. Instead, it has been well and safely invested (insofar as anything invested in pvp can be called "safe").

Of course, there is a limit to how many Vengeances one pilot needs, so if next month is this profitable, I make no promises...

Income

This month, solo roaming generated about 38% of my total income, which is consistent with last month's figures. However, if I correct for the Assault Ship roam (which was earned in July, though paid in August) that proportion jumps to 62%!

It's also quite interesting that August did not generate even a single ISK in ransoms (there was one joke ransom, but I did not include this in the accounts).

Expenses

While my income numbers in the same ballpark as last month, I had far few losses, and therefore lower expenses. This is in line with the goal I set myself last month of reducing unnecessary losses, but the cynic in me suggests that I simply did not have enough play time to lose many ships.
Unlike last month, my one really stupid mistake (the avoidable loss) occured during a group action (I'll be posting about it later). While I am more "on my toes" in a group, and wild ideas are subject to a sober second thought, group actions can also be far more complicated, and I really fell down on this one. Fortunately, nobody else paid the price for my idiocy - something I don't have to worry about when flying solo.


Improving Profitability

Last month I set myself some goals for improving profitability. It's time to review those.

1) Minimizing avoidable losses. This is probably the easiest (and one of the most lucrative) changes I can make to the way I pirate. Cutting out just half of these needless expenses would have more than doubled my profitability for the month, not to mention helped me feel like less of an idiot. Minimizing these losses means staying alert and maintaining target selection discipline.

There was a sharp reduction in avoidable losses in August, so I think I've met this goal. Of course, this is an improvement I need to maintain if I hope to remain profitable.

2) Embrace opportunities for group work. Tuskers have formal roams only infrequently. However, we do like to gang up on above class targets. Keeping alert for these opportunities is likely to improve my profitability. Equally, putting aside a ship purpose fit for group work, (such as a fleet tackler) will improve the likelihood of the groups success, and the chances of snagging the pod. Although my interceptor skills are fairly limited I will put together a dedicated fleet tackler for group work.

I did embrace group activities, and I did use (and lose) a fleet tackler, so goal achieved. However, this months numbers do not show a huge uptick in group income, so I'm hardly about to abandon solo work in favour of group roams at this stage.